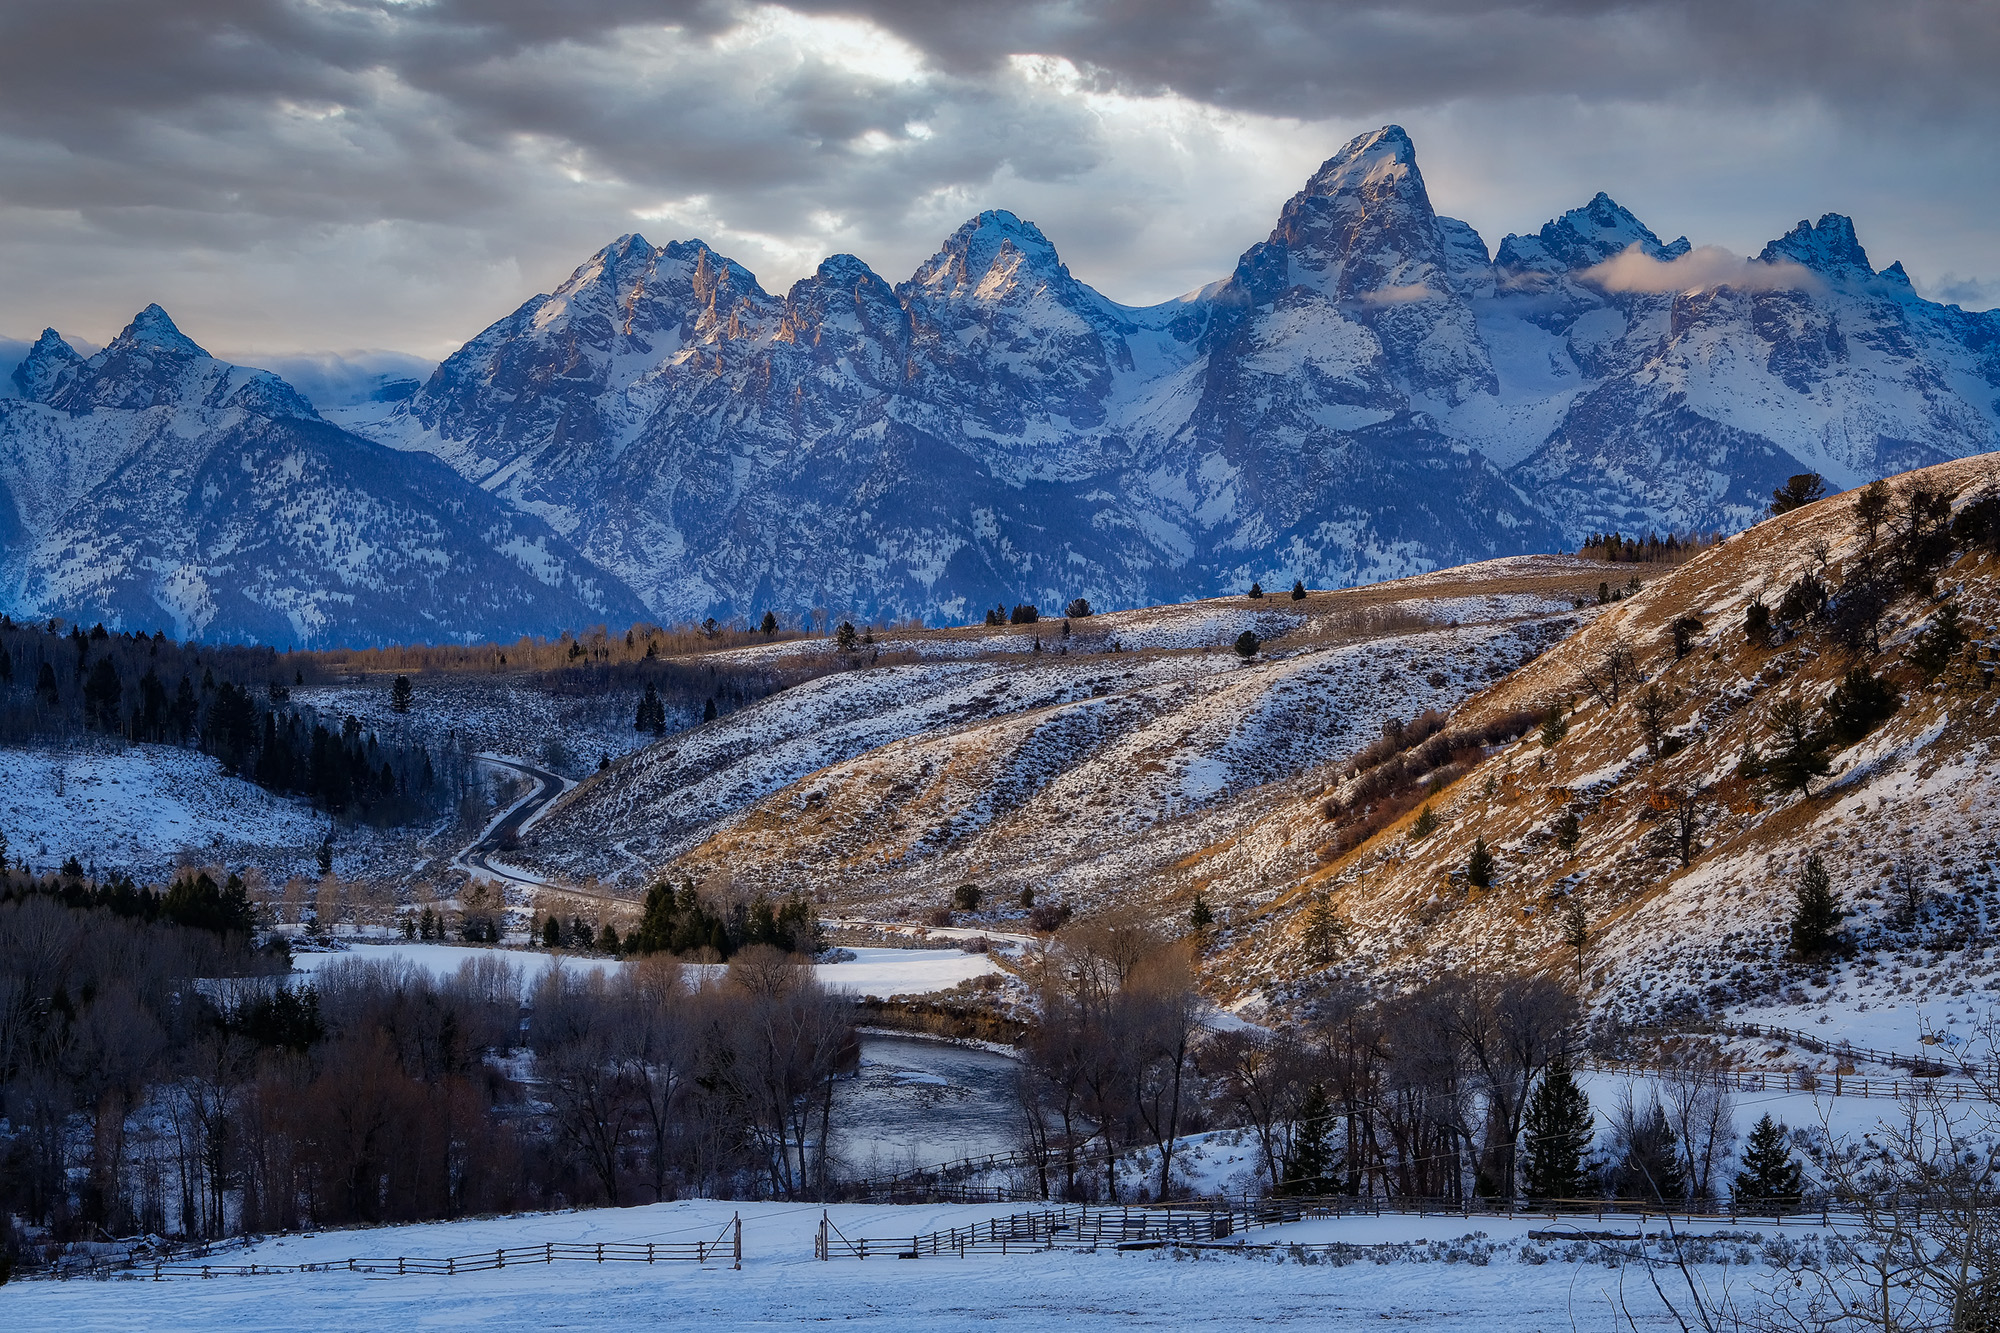
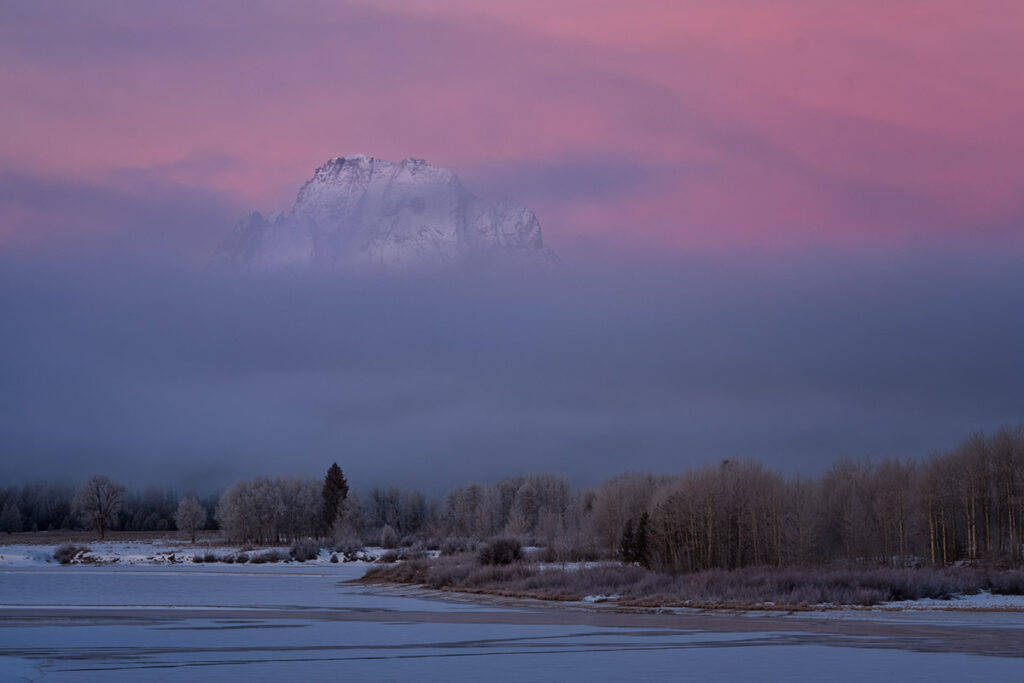
When the weather turns cold and wet, photographing in the winter can be a rewarding experience! The Pacific Northwest is a beautiful area, from the sea to the mountains, and during winter time it takes on a different type of beauty. Gone is the lush foliage and white puffy clouds and in their place is dark clouds, rain and snow over a landscape of evergreen trees and stark beauty. Winter is perhaps my favorite season for photography because the landscape and environmental conditions are so unique and at times ethereal and the compositional possibilities can be much broader than any other time of the year.
If you are planning to go out and photograph in the winter, there are a few things that you should keep in mind in order to have the best experience possible. This isn’t an exhaustive list of tips and tricks, just advice from someone who has spent a good part of his photography career photographing during the winter season.
Protection for your gear and yourself
If you have the right gear, photographing in the winter is easy and can be fun. In fact, one morning we were in Grand Teton National Park during winter and when we stepped outside of our trucks, the temperature was minus 24 degrees F!!!! That was cold, but with the right gear, we were OK for a decent amount of time before we had to retreat to the warmth of our vehicles. If you dress properly, avoiding cotton clothing, and have a clothing system of layers so that you don’t overheat and sweat (which can cause issues when you slow down and get colder), you’ll be fine. Start with a base layer of performance long underwear. Over that you will want mid-layer insulation (fleece or down jackets) and then a wind-proof/waterproof outer layer. Add to that a proper winter hat to keep the heat in and keep your ears warm. Of course you’ll want gloves to keep your hands warm and dry, and, with enough dexterity to operate your camera. This  is a tough combination to fulfill. Many gloves are warm and bulky, or, dexterous enough to operate your camera but not warm enough or waterproof. When its really cold, I have settled on a system of glove liners inside of warmer outer gloves. I can remove my hands from the bulky gloves and have the liners on to give some protection while I operate my camera and then slip my hands back in the larger gloved to warm up. The best winter glove combination I’ve found so far is this system from the Heat Company. In cool/cold settings, I typically opt for a medium weight windproof glove, something like this or this, that gives me a good compromise between warmth and dexterity.
Protecting your gear when photographing in the winter is perhaps easier than protecting yourself. Most modern camera systems have adequate weather sealing (check with your camera manufacturer!) to withstand light rain and snow falling on it. When the rain/snow really starts falling, I do recommend using a rain cover for your camera. There are many elaborate, complicated rain covers available today and watching folks in the field trying to use these can be highly entertaining. The fact is, we don’t use rain covers often enough for us to be comfortable with the set-up or use, so my recommendation is to keep it as simple as possible. The favorite simple rain cover I’ve been using for several years is the Storm Jacket. Easy to install with one  velcro strip and one bungee cord and you can even do it with bulky gloves on. You do need to expose the back of the camera a little bit to operate the controls when shooting, but again, our cameras are typically weather sealed and this isn’t a problem. And again, keeping it simple will increase the chances that you’ll actually use it in the field. And one last recommendation…..in a pinch, the shower caps from your hotel room work as great disposable rain covers. Grab them and put them in your pack for a quick on/off cover to protect your camera.
Exposure Compensation
Your cameras exposure metering system is designed to read the scene and report back on the lights and darks it finds (based on the metering mode you’ve selected). The system does it best, but it’s not infallible, and, when photographing in the winter, the snow can really mess with the metering of a scene. Your camera “sees” the snow as a light value and when there is a lot of snow in your scene, the camera will read this as a lot of light and will reduce the  recommended exposure. If left to its own devices, the camera will expose so that the snow comes out as a middle grey. The camera is not faulty, not at all. It’s doing its job and 80% of the time it is very accurate. When you are photographing a snowy scene, you will need to compensate for the cameras metering choices and add more light to the exposure. The best way to do this is via the Exposure Compensation function on your camera. Depending on how much snow is in your comp, I would recommend adding 1/3 to 1 stop of EV to your images. The more snow, the more EV needed as the camera “sees” more light and will dial back the exposure more.
White Balance
White balance is also something you need to be aware of when photographing in the winter. Snow tends towards the blue side of the color spectrum, which is sometimes OK as we associate blue with cold and winter images might convey cold. However, there can also be too much blue in the scene. Getting the “right” WB set in camera can sometimes be tricky and experience here helps a lot. You can either set your WB to a specific Kelvin value (ex 5200) or set your WB to Flash or Cloudy settings, which might help remove some of the blue introduced by the snow.
Shoot RAW
 There are a couple of very strong reasons for shooting in RAW format when photographing in the winter. First is that if you need to make adjustments to your white balance, you can do so easily in the RAW format in your post processing software. Secondly, winter scenes can have very extreme dynamic ranges, the snow and the dark rocks or tree trunks and in RAW you have more leeway to push and pull on the range without destroying your file in post.
Meter for your Subject
Because the snow can be read as a lot of light hitting the sensor and your camera will adjust accordingly, if you are photographing a particular subject, it’s important to adjust your metering 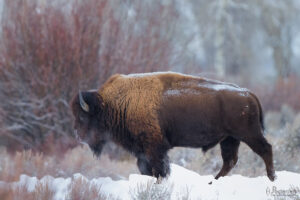 modes and exposure for the subject, not for the overall scene. This may result in the surrounding snow being blown out in some scenarios, but that’s OK if your main subject is strong. This is especially important when photographing wildlife in the winter. Photographing dark animals like this bison (right) in a snowy scene, the camera really doesn’t know what to do and more often than not, the camera will read all the light and severely underexpose the bison, rendering it black or nearly so.
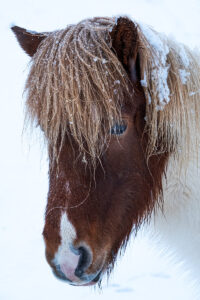 Likewise, when photographing this horse in Iceland, I exposed for the horse and didn’t care what happened to the surrounding snow. It did blow out a little bit but I didn’t care because I wanted the most detail possible in the horse and didn’t want to have to recover deep shadows or dark tones in post and possible damage the overall quality of the image.
What I recommend in these situation is to either use Spot Metering in your camera and meter your specific subject, or, add enough EV so that your subject is properly exposed. You will most likely need to take control of the exposure in these challenging situations, so knowing your camera controls is essential.
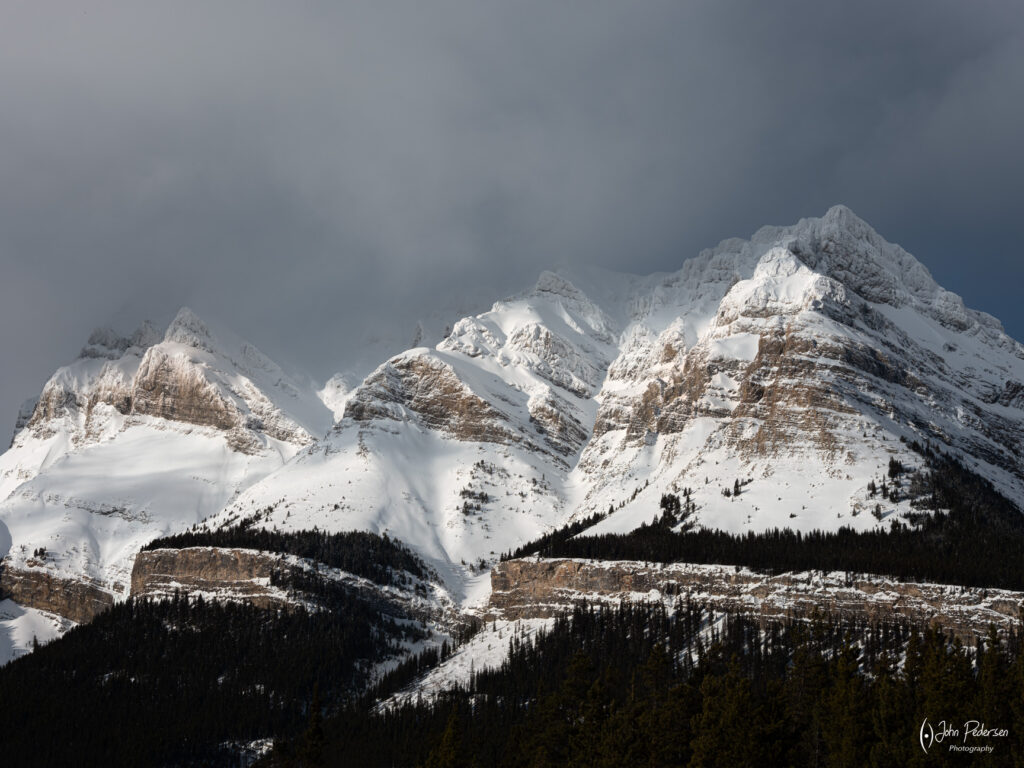
Angle of the sun
The great thing about photographing in the winter is that the days are shorter and the sun doesn’t typically rise as high in the sky, providing low angle and side lighting across the landscape. This is a lighting condition we don’t enjoy year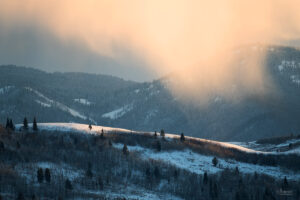 round so during the winter I really make a point of trying to capture images that take advantage of this. Take the time to look around and notice the light and what its doing to the scene. You may see photographs that you wouldn’t normally take, but with the low angle light, you can find some very interesting visual effects.
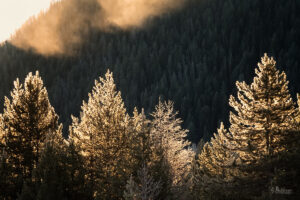
Backlighting is another phenomenon that works really well when photographing in the winter. Especially when there are ice crystals or frost on the trees. Just after sunrise as the sun gains a little elevation is the perfect time to look around for backlit subjects.
Use the snow as negative space
Don’t be afraid to have more negative space in your images and the snow can act as a great negative space, giving your main subject room to “breathe” Snow has some intrinsic interest, even though it is monochromatic and doesn’t have much texture. People recognize it is a “thing” and that “thing” can work well to fill up large parts of your image. Having more negative space may also bring more “calm”, “quiet” and “peace” to your winter scenes, like how things get quiet right after a new snowfall.
Monochrome
When photographing in the winter, I highly encourage you to “see” in monochrome for your images. The landscape will be largely monochrome anyways…white snow and dark tree trunks or dark rocky mountains. There just isn’t a lot 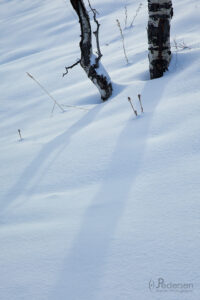 of color in winter scenes, so take advantage of that and look for great monochrome shots. Study up on the Zone System, or just trust your gut and look for dynamic range, contrasts, patterns, shapes, textures, drama, etc and then remove the color, either in camera or in post.
This image I initially captured in color and then converted to monochrome. When saw this shot, I was immediately thinking in monochrome and worked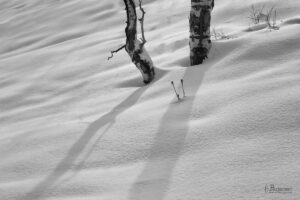 to compose the scene for how it work best absent of color information. The angle of the shadows, how much of the dark tree trunks to balance out the lighter snow, etc. I also shot in portrait and landscape orientation and chose which one I liked best when I got home to my computer.
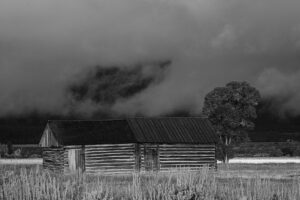
Drama
Winter time brings lots of storms, clouds and drama to a scene. When photographing in the winter, 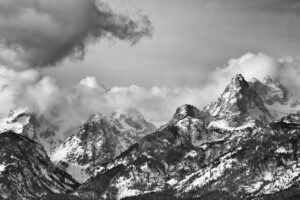 really look to capture the drama of the tumultuous weather conditions over the landscape.
Use the clouds to add drama to the scene, make them a compositional element.
Drama works in both color and monochrome, though I prefer for really dramatic shots 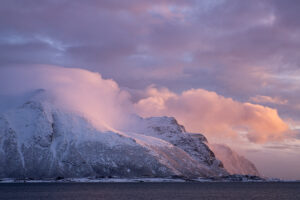
 to have them in monochrome.
Patterns, Shapes and Textures
Ok this is where it really gets fun and where you can let your creative artistry show when photographing in the winter. As the snow blankets the landscape, it turns ordinary features in to otherworldly sculptures. The wind blowing across the snow can create patterns and textures that you wouldn’t see any other time of year. When photographing snowy scenes, I’m like a kid in a candy store exploring different types of compositions than I would normally shoot.
 This image was taken in Grand Teton National Park. We were driving along the road when I looked down the bank to the frozen river and saw these little streams had cut a nice pattern in the snow. I stopped and spent a good 30 minutes photographing this in different ways. Trust me, any other time of year and I wouldn’t have given this scene a second look at all as it is just swampy marsh underneath the snow.
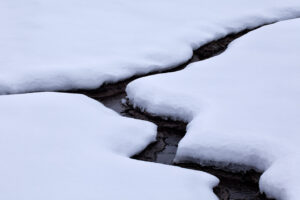
Here’s another image from Grand Teton park, along the banks of the Gros Ventre river. Just a small scene that I happen to notice when I looked down from focusing on the grander landscape. The pattern and shape of the curve of the frozen ice really caught my attention. I turned my camera away from the larger landscape and focused on the details in this scene.
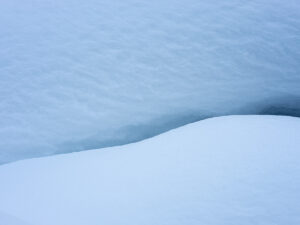
Even just small folds in the snow can be turned in to interesting abstract images. This one was taken in the Canadian Rockies and its just the gap between two snow pillows that had piled up on the rocks. There was something about the shading on the snow and the shape of the gap that caught my attention to photograph.
The snow itself can have different textures that you can highlight and capture in your compositions, plus the way the snow accumulates on the underlying landscape can bring interest and intrigue to an image. Don’t be afraid to experiment with different compositions.
Even something as simple as ice forming alongside a small creek can be turned in to an interesting photograph.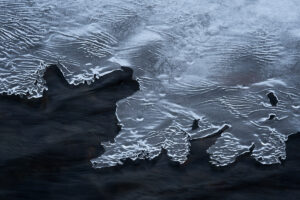 This particular image was taken in Iceland during the winter. I completely ignored the larger waterfall in front of me and instead focused my attention on the smaller details around me instead of the obvious composition.
Get Out and Shoot
I think that photographing in the winter is as rewarding, if not more so for certain types of images, as any other season on the calendar. If you are prepared with the right gear, the experience can be extremely rewarding. Gone are the crowds, the landscape is quiet and the animals are typically closer as they come down from the high country to more hospitable locales. With drama in the skies and endless interest in the snowy ground, there is an endless variety of images to capture.


Leave A Comment