When you come home from a photo shoot and want to work on your images, do you create a processing recipe for images you work on? A list of all the adjustments you’d like to make to the image to get it to the final, envisioned, state? For me, making a mental note of the edits I want to make on an image before I start oftentimes produces better results than if I just “winged it” through the photograph. I’m not rigid all the time in my processing style, with some images, I do wing it, either because I’m lazy or I just want to see where my energy takes me. But other images, the ones that I really care about and want to get “just right” I will have a processing recipe to follow in my head to help me stay on course and get to a pleasing end result. There is a TON of information out on the web about HOW to do edits, but knowing WHAT to do is a bit more mysterious and lacking. This is because we are talking about art and more specifically your art, which is all subjective and subjective to you. So knowing WHAT to do is up to you and what you like and this is where deciding how you want the finished image to appear is critical and then building a roadmap to get there.
I have processed so many images that I no longer need to write my processing recipe down,  but back in the day I used to actually write out a list of the edits I want to make. Similar to how darkroom masters used to sketch out their edits before heading in to the darkroom, having an idea of what you need or want to do, and maybe even a course or path set, can help you achieve great results. I’m not saying make the same edits on every image! No no. I’m saying following a protocol for how you approach developing your images so that you don’t get “lost” along the way and can produce consistently good results in the end. Every single image I process requires different edits and I never use batch processing or profiles or templates to develop my images. Each shot is unique in its own way as well as my intention for the shot, or story I’m trying to tell, is unique across frames. So that means I need to unique edits that are specific to each image.
I know that sound tedious to have to think about each image and make the same decisions over and over for each image from a photo shoot. But in practice, once you develop some mental and muscle memory, it is not as much work as it might sound. There are consistent things that I do across most of my images, such as setting white balance, adding some mid-tone contrast, vignetting at the end, etc. But in between all those, each image requires a different set of adjustments. If you’ve ever paid attention to the order of tools in Lightroom or Camera Raw, you will see that these are arranged in a somewhat logical order to move through the image with edits; moving from global to local, moving from foundational exposure settings to artistic/creative edits. The folks at Adobe have given a lot of thought to how their tools are laid out.
When I select an image from my catalog to process, I do a visual scan of the image and lay out most of the edits I’d like to make to it. Some of these edits are dictated by the image itself and what is in the composition, some are dictated by how well I captured the frame (or didn’t capture it well) and some are influenced by my mood at the time of processing. I’d like to say my mood doesn’t play in to the final edits, but it does. If I’m happy I tend to edit differently than if I’m sad, etc. It’s human nature I think. Regardless, I still make a processing recipe in my head of all the things I think I’d like to do to the image before I begin touching any sliders or masks! I have a relatively clear picture of how I want the finished image to look and most of the steps to get there fixed in my head before I start down the road of sliding sliders and masking masks. I want to know what direction I’m heading before I take that first step down the path! I will say though that once I do get in to the meat of editing, I may need to change my mind or vision. Sometimes the image isn’t cooperating with me and I can’t get it to look “just right” for what I want. At this point I will either adapt my vision for the finished image or abandon the image.
Enough words, let’s take a look at a couple of images and what my processing recipe might be for each
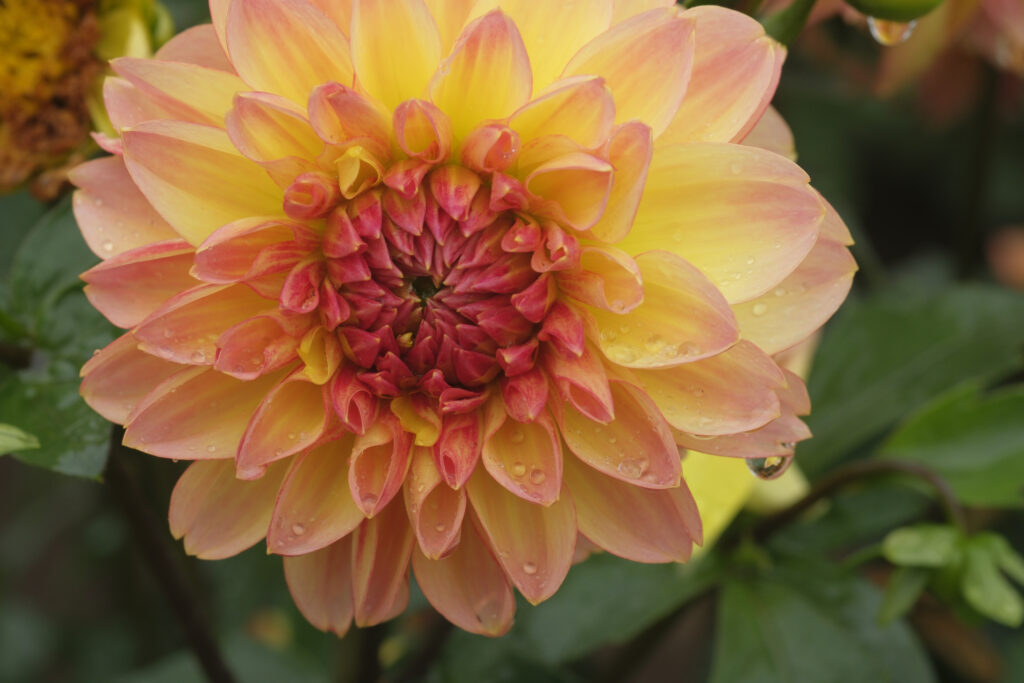
Here is a raw, un-edited photograph of a dahlia flower I took last year and here is the processing recipe or edits I might make to this image and some of the thoughts behind why
- Create separation between the flower and background
- Brighten flower/darken background to help create separation and focus the viewer on the flower, not anything else
- Add a bit of color work to the flower to make the colors pop
- The water drops are important, so do a little work to hopefully make them stand out a bit more
- Selective sharpening around the center of the flower. Our eyes are drawn to the sharpest parts of an image so to keep viewers focused on the center, I need to make sure it is sharp.
- Add a final vignette to darken the borders of the frame and keep the eye in the middle
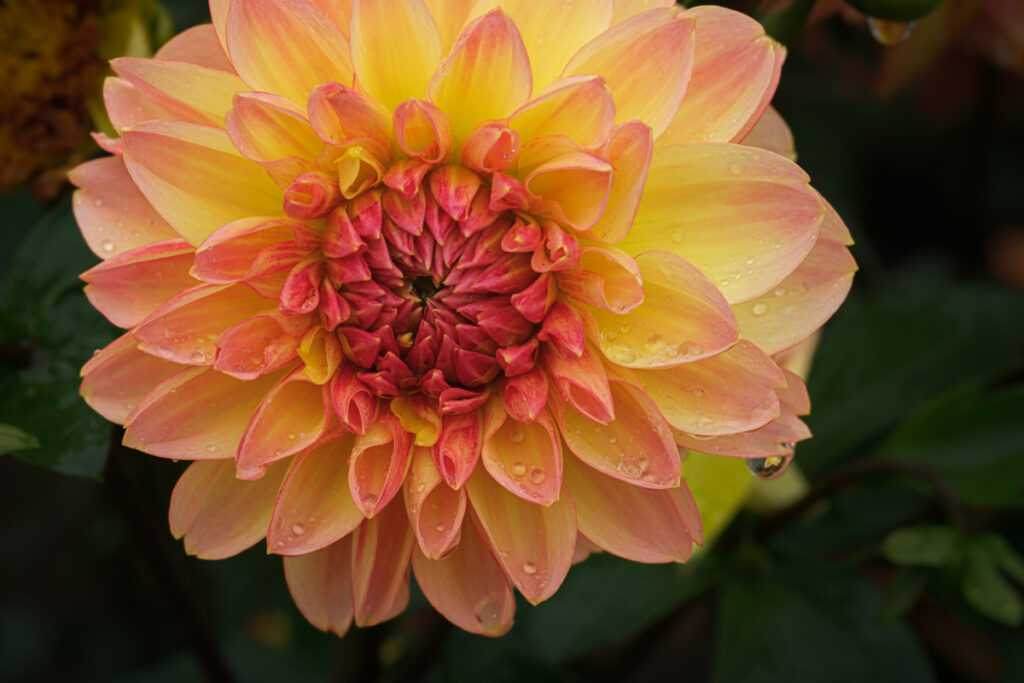
And in 5 minutes, here’s the finished edited image that I think achieved my vision and followed my processing recipe
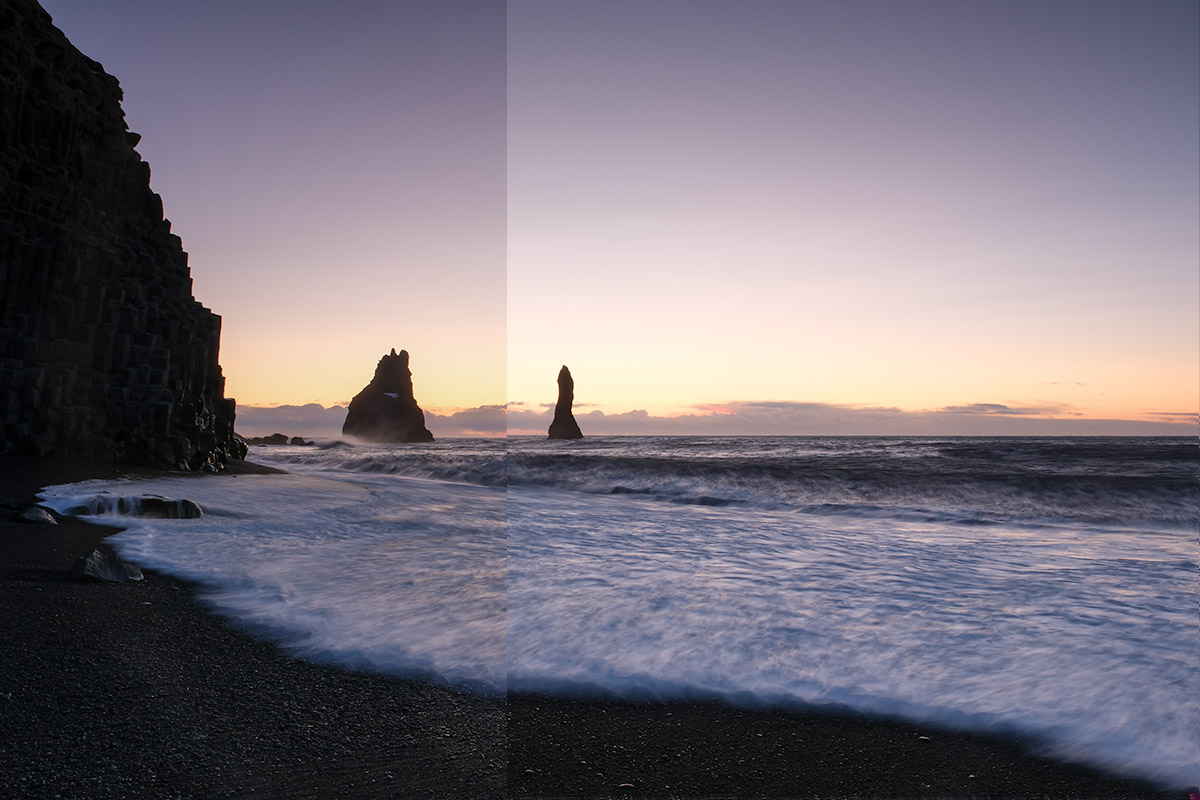
Lets look at one more image, this one from Iceland

My initial thoughts for my processing recipe as this image came up were…
- The sky is on the verge of blowing out, so I need to darken the brighter parts some
- I know there is a lot of color in the sky and I want to bring that out
- The shadows need to be raised. Lots of very dark space in the shot, creating visual weight on the left hand side
- I can see that some of the shadows are probably pure black, meaning I lost detail and cannot recover them. So I’ll have to accept that or move to a better exposed frame
- Take some of the blue tint out of the water so it better matches the sky
- Remove some of the more reflective rocks on the beach so they don’t grab attention
- Take some of the brightness off the surface of the water. See if I can bring out any more detail in the water
- Vignette (of course) at the end
and here is the finished edit
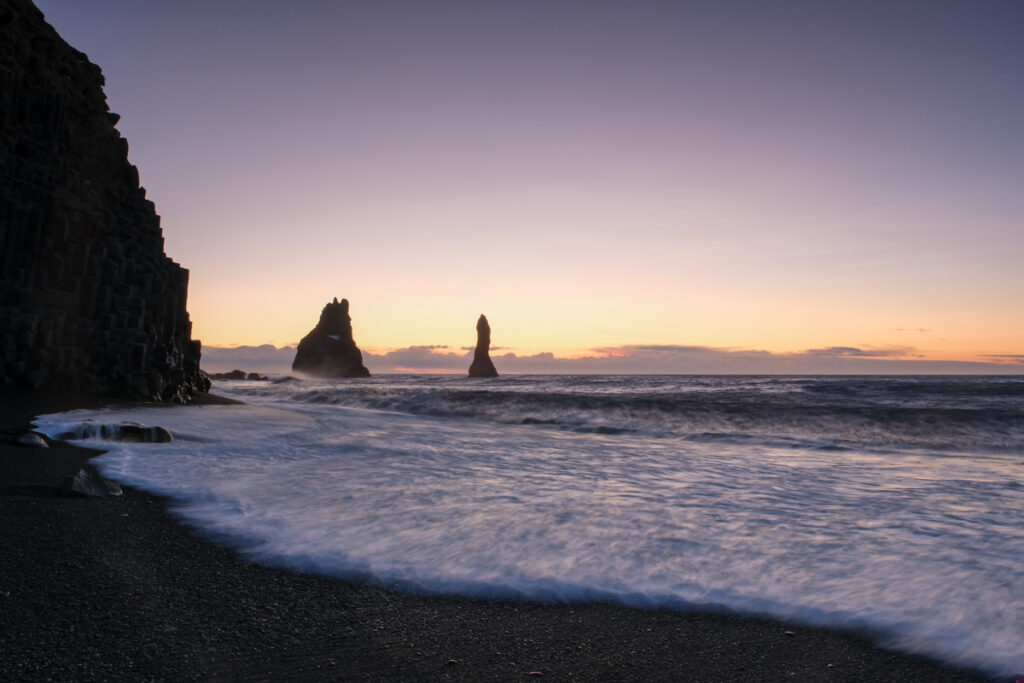
I was able to recover some details in the rocks on the left, but in the end, had to live with some blocked up shadow areas. Overall I’m pleased with the finished result for a quick edit.
Now, two things to mention before I end this discussion on having a processing recipe.
- There may be times when you are deep in to your workflow and an edit you make affects the “feel” of an earlier edit. It’s OK to go back and revisit previous edits as you move through your workflow. In fact, it’s almost mandatory. Lets say you make an initial Contrast adjustment to the image, then you work on Texture and Clarity, which is a finer form of contrast. You may need to back off your earlier Contrast adjustment somewhat because you added more in a later step.
- I hope you noticed that I didn’t mention anything about HOW to make these edits! There are so many ways to get to the end result of an image and YouTube is flooded with people teaching HOW to do something. I’ll leave figuring out HOW to do something or which exact tool you want to you, to your discretion. It’s more important to know WHAT to do, that’s the hard part. Figuring out HOW to do something is easy once you know what it is you want to do.
So I hope that was helpful to you in a way that might aid you when you sit down to process your images. Having an end vision in mind, listing out the steps you want to take to get there, then acting on those steps, possibly revisiting earlier adjustments, until you reach your goal. Having a processing recipe will help you stay true to your vision and keep you on course for your finished image.
Leave A Comment