Lately I’ve been thinking about and studying a portion of photography that I call light shaping. What is light shaping you ask? Well, as you know, when we capture a photograph, we are really capturing light, or the absence of light, on the sensor and then the memory card. That light is then translated in to a photograph. As a landscape photographer, I do not have direct control over the light in a scene, but I do have control over how much light I let in to the camera, what angle the light is to my subject, how I use the available light across my composition and then how I process that light in the digital darkroom. For many years, I’ve been a “student of light” and have learned that this is the one key element to a photograph, more so than the actual subject, for making a compelling image. Here is an older blog post related to light, called Shoot the Light that may give a little background on how to evaluate the light and use it more effectively in your compositions.
As a brief aside, one of the things I teach my students is to look beyond the overall image and look at the individual components in a composition and evaluate each independently, then evaluate how they all fit together as a whole in the chosen composition. Evaluate the light, texture, pattern, shape, balance, etc etc…..as “things” within the comp and then look at the whole image in its entirety. Being able to look at the individual pieces of a composition, looking beyond the main subject, can be very instrumental in helping you to refine your composition in order to convey the story that you are trying to tell in your shot.
Now, back to light shaping and how to think about this concept. How the light is captured in the scene can do several things in your image. It can…
- Direct the viewers eye to where you want them to look
- Add depth and dimensionality to an image
- Impart a feeling
- Create a mood
- Add or move visual weight in an image
- Provide balance (or unbalance) in an image
These are things that you can choose to do, or choose not to, both in the field as well as the digital darkroom, as you think about “light” as a separate component in your composition and then practice light shaping thinking in how you execute and then process the image.
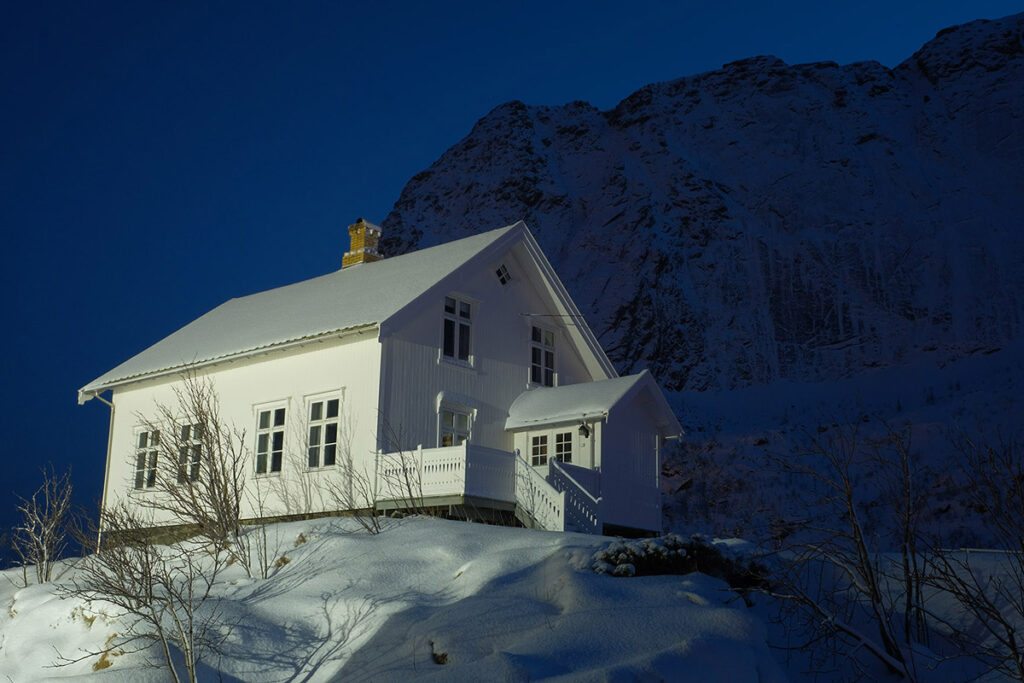
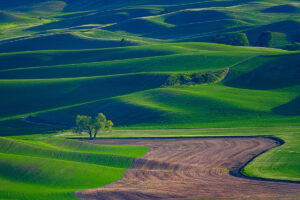
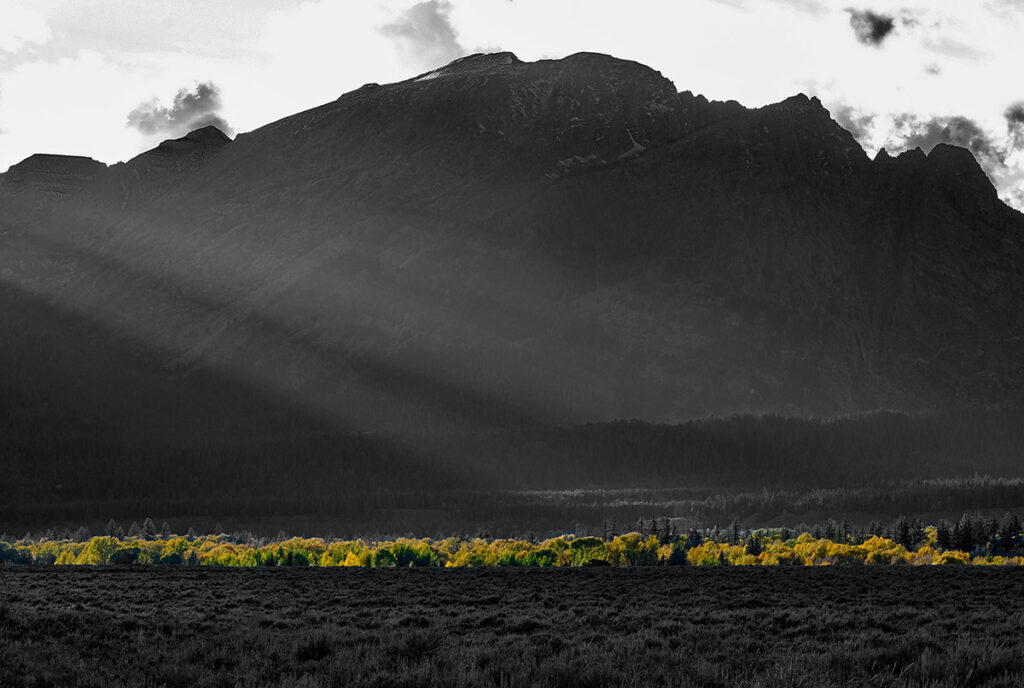
I positioned myself so the light accentuate the subject and aligned with the dark mountain behind
Light Shaping begins in the field
As you are evaluating a composition, evaluate the light. What are the qualities of the light and how will those qualities help, or hinder, your intent for the composition? Based on the quality of light, do you need to change your composition to take better advantage of the available light?
 How is the light illuminating the subject? Is it flattering the subject or detracting from the subject? A lot of this depends on the angle of the light and the direction of the light through your composition. One way you can shape the light in the field is to change your angle relative to the light. Even though you can’t control the sun, you can control the angle at which the sunlight is entering and leaving your composition as well as the angle of the light on your subject.
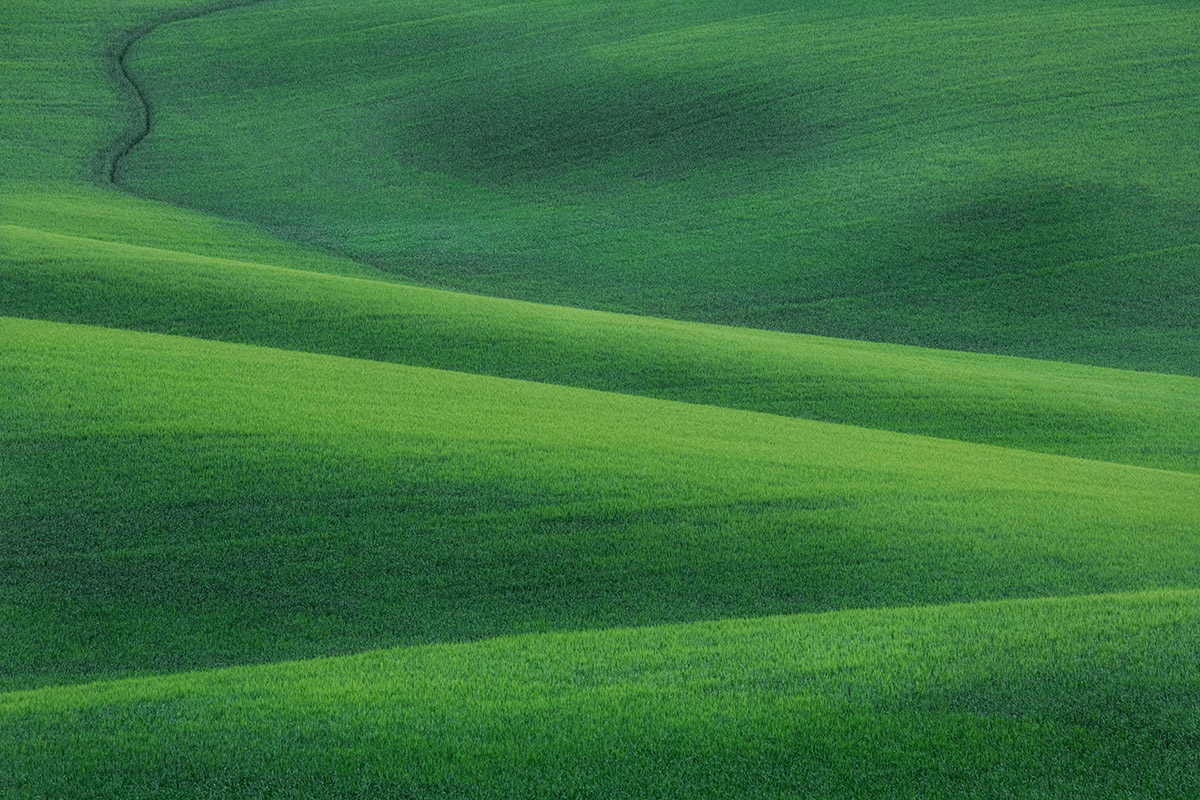
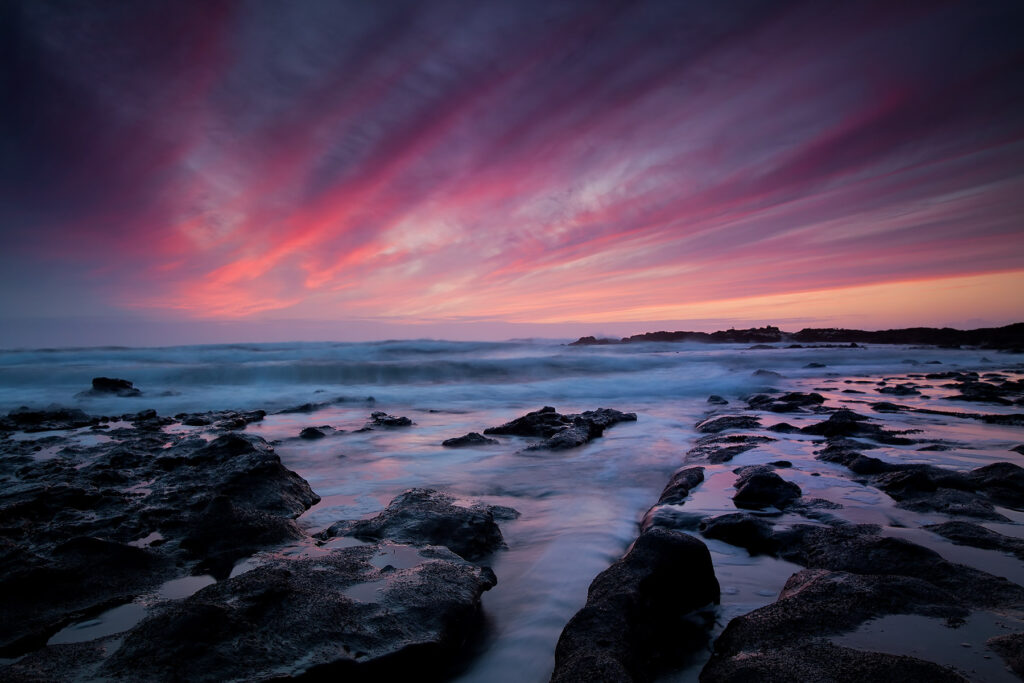
Another way to practice light shaping is to evaluate how the lights and darks are distributed throughout the frame. Where are the light areas and where are the dark areas. What does this distribution of lights and darks do to the “feel” of your composition? You can change this distribution, not with a backhoe, but with changing the angle you are shooting at, and/or shooting at a different focal length to include more of less of the darks or lights. Remember, our eyes will always be drawn to the lights in an image, so how we orient the lighter areas of our scene in the composition can have a direct affect on the way our brains process the information and how our eyes travel in to and through the image.
Distribution of lights and darks can also affect the visual balance of a composition.  Your choice on how much of the lights and darks are included in the comp, as well as where they are located in the comp, directly affect the feeling of “balance” or “unbalance” in an image. It’s up to you whether you care about or want balance in an image, I am just pointing this out so that you can be aware of it. By the way, our brains do like “balance” and I feel it does add to the overall appeal of an image.
Lights and darks can also provide a sense of visual weight of the objects that you have chosen to include in the composition. The darker the object the “heavier” it is perceived. Knowing this, what you chose to include in your composition and its relative tonal value and where it is positioned in the frame can have an affect on perceived weight in an image. This is you knowingly light shaping by choosing what to include in a comp and evaluating its visual weight and then assessing whether it adds or detracts from your composition. If it detracts from your vision for the image, then work to exclude it from the shot (if possible) by moving your feet or changing your focal length.
I hope that the above makes some sense as to how you can use this concept of light shaping in the field to evaluate your composition in the field and make adjustments so you can better achieve your vision for the image.
This image has 4 layers in PS devoted to nudging the lights and darks to the tonalities I want in the final image.
Light Shaping in the Digital Darkroom
We have immense power in the digital darkroom to shape the light exactly as we would like it. In fact, we can completely alter the tonal values of an image if we so choose, but then we get in to the discussion of photography vs. digital art and that’s not the point of this article. I’ll let each of you decide where your boundary line is and how far you are willing to push it. Instead, I want to focus on some techniques that you can use in the digital darkroom to practice light shaping, to which ever degree you see fit. There are a couple of areas I want to focus on. I don’t often talk about “how” to do something in a specific tool…there are many great photo editing software programs out there. You choose what works best for you. I continue to use Lightroom, Photoshop and NIK as my primary image editing programs.
Balancing tonalities in an image – You can chose to have a high-contrast scene or a less-contrasty scene. Each one is completely acceptable, it all depends on your vision for the image as well as the subject matter and what best represents the subject. Sometimes you want “high energy” and this typically means more contrast. Other times you want a “quieter” image and that means less contrast. Adjusting the tonalities in an image is a method of light shaping to bring a different “feel” to the image. For me, I typically work to have quieter, balanced tonalities across the image when I first enter the darkroom. It’s from this “neutral” palette that I can then add lights and darks as I see fit to shape the light.
Accentuate/de-accentuate features – Doing this is at the heart of light shaping to direct the eye and add dimensionality to an image. I spend a lot of time in this area to make very subtle adjustments to images in order to direct the viewers eyes or to really make my subject “pop” in the image. I also use this to bring depth and dimension to an image that might be considered “flat” in its RAW state. Remember, our photographs are 2D and one of the things I strive for is to create a sense of 3D in the image. This sense of 3D helps viewers better connect to an image and place themselves in the location to more “feel” the shot. Shaping the light and dark areas of an image is one of the easiest ways to bring a sense of depth to an image (if your composition doesn’t naturally have depth elements ie. leading lines, fore/mid/backgrounds). Check out this video of an image shot in the Palouse that is pretty flat to begin with and then within 5 minutes of work, has much more depth and dimensionality to it. Just by using simple dodge/burn techniques on different areas of the image.
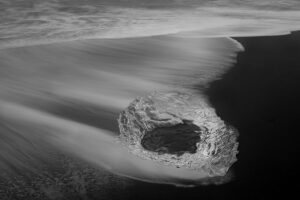
Vibrancy and Color – How vibrant different pixels are in your image, translating to how bright certain colors are, can have a direct impact on how your image is perceived. In talking about this, I don’t ever add color where its not present, but I may boost certain colors in an image if I feel it is important to the final output. Since color is nothing more than different waveforms of light, shaping the color is also considered light shaping in my book. Check out this video as an example of how I shape the light and color in a wave image to really bring out the power and dynamics of the image.

A simple vignette can add depth to a flat brick wall
Vignette – One of the elements of light shaping that I do to almost every image is add a vignette. I find that this does a few things for my image..1) it quiets the boundary of the image helping to move focus away from the edges to the center (or wherever I put the center of the vignette) and 2) it can add depth and dimensionality to an image.
Conclusion
I hope that you have a sense of this concept of light shaping and how to think about it in the field as well as the digital darkroom. Light is the foundation for all of our photographs and how that light is represented in our images can have a profound impact on the image. Think about “light” as a separate element of your images before you take the photograph. Move your feet, change your focal length, evaluate the weight and positioning of objects in your comp, look at the tonal balance…hopefully all of these line up and support the creative vision you have for the composition.


Leave A Comment