Yes, here it is, my Fall photography tip, from me to you! :-) I say that somewhat sarcastically and please bear with me a little bit on this. It is the season for all manner of articles, both online and in print, with “10 tips for amazing fall photography” and “7 amazing tips to capture the best fall color”. Yep, I get it, tis the season and its a great way to get people excited to capture some color as well as get some clicks and advertising revenue. Just like clockwork these articles start appearing in early September, peak by the first of October and then taper off in to November. I will admit that over the years I have read quite a few of the articles, seeing if there was anything I could learn or a new trick that someone is sharing. These days though, I tend to just pass them by as most of the articles are just a re-hash of the same information.
So if I’m poking fun at the Fall photography tips genre, why did I title this post with Fall Photography Tip? Notice the word tip is singular, not plural, meaning I have just one fall photography tip….which is, simply get out and shoot!!! The more you shoot the better your “creative muscle” becomes, the more enjoyment you will have and you might just come home with some nice images. Shoot in good weather and in bad, shoot in good light and in bad…it doesn’t matter, just go shooting. You don’t even have to share any of the images if you’re not happy with them, and remember, even a failed attempt can be a learning opportunity for you. What worked, what didn’t and why and what would you do differently next time. Fall is perhaps my favorite season of the year as the leaves turn and the world starts to bed down for the coming winter. I try every year to make some dedicated photo trips to capture Fall foliage, as well as have many impromptu photo opportunities. Heck, even walking the dog through a neighborhood wetland area provides some great opportunities for “seeing creatively” and even photography (with iPhone or Fujifilm). The point is, there is so much color, texture, pattern and shape evident during this time of year and it’s those things that are the compositional building blocks to make a great photograph.
So there ya have it, my long awaited Fall Photography Tip!!! :-)
On a related note to put in to practice what I’m preaching above in my Fall Photography Tip, I recently had a wonderful opportunity to do some Fall photography for myself. I belong to a local artist owned gallery and I’m turning in to their staff photographer for certain things and recently was asked to do a group photo session in a sunflower field at the West Union Gardens to be used in marketing and in-gallery promotions. I knew sunflowers were late summer flowers but didn’t think they were still worthy in late September…I guess I found out otherwise! There is a local farm not too far away from my home that is a type of u-pick vegetable and flower farm, with a lot of acreage that they cultivate. I had never been here before as there is so much to photograph here in the PNW, it’s hard to get everywhere. Well, our group meeting time was scheduled for 9am and I wanted to get there early to “slow down” and get in the zone creatively, and maybe grab a few images for myself before I had to put my work hat on and shoot the group. I grabbed my Fujifilm GFX50s and Mavic Air2 drone and arrived at the farm about 1 1/2 hours early, just as the sun was rising. There was a solid layer of morning fog when I arrived adding a mystic quality to the landscape. Expecting the fog to burn off with the rising sun I worked quickly to compose a few sunflower shots incorporating the fog as a compositional element. Here is one that I was happy with when I got home to review the shots.
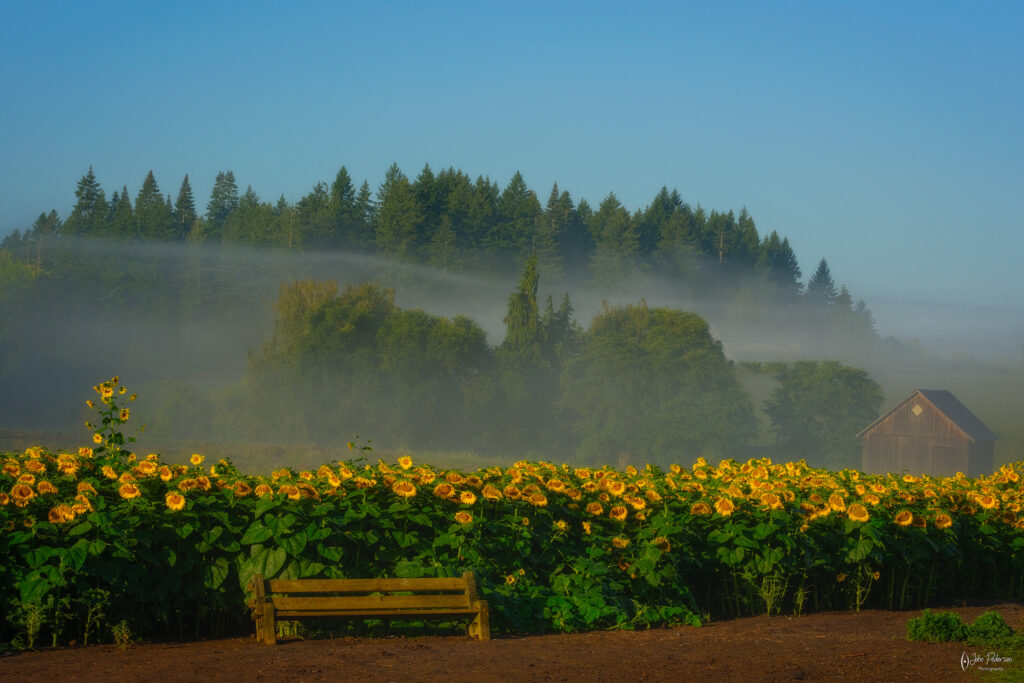
Sunflower maze at West Union Farm
As the sun was competing with the fog for dominance in the sky, I quickly started walking the fields looking for good examples of sunflowers to take some close-up shots. 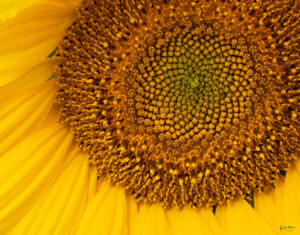 I slapped on my Fujifilm GF120mm macro and walked the maze of sunflowers (Yes, they made a maze in the field). Whenever you are shooting flowers, lighting is an extremely important factor in the overall image. Its partly personal taste, but when shooting flowers, I prefer to have more even lighting across the flower, from petal to center, and not have a high contrast in the image. I feel that the flower presents itself better that way. My search led me to flowers that were 1) healthy looking and 2) properly lit for what I wanted.
As the sun was rapidly rising I had to move quick to find, compose and shoot a few shots. When shooting close-up or macro, because you’re working with such a shallow depth of field, any movement can destroy an image. Thankfully this morning there was no wind and the only movement was when I had to jam my tripod in to the stalks to get close enough to the flower to fill the frame. I don’t do a ton of really close-up work and i continue to learn each time I go out.
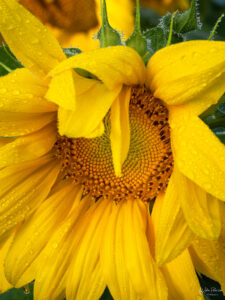
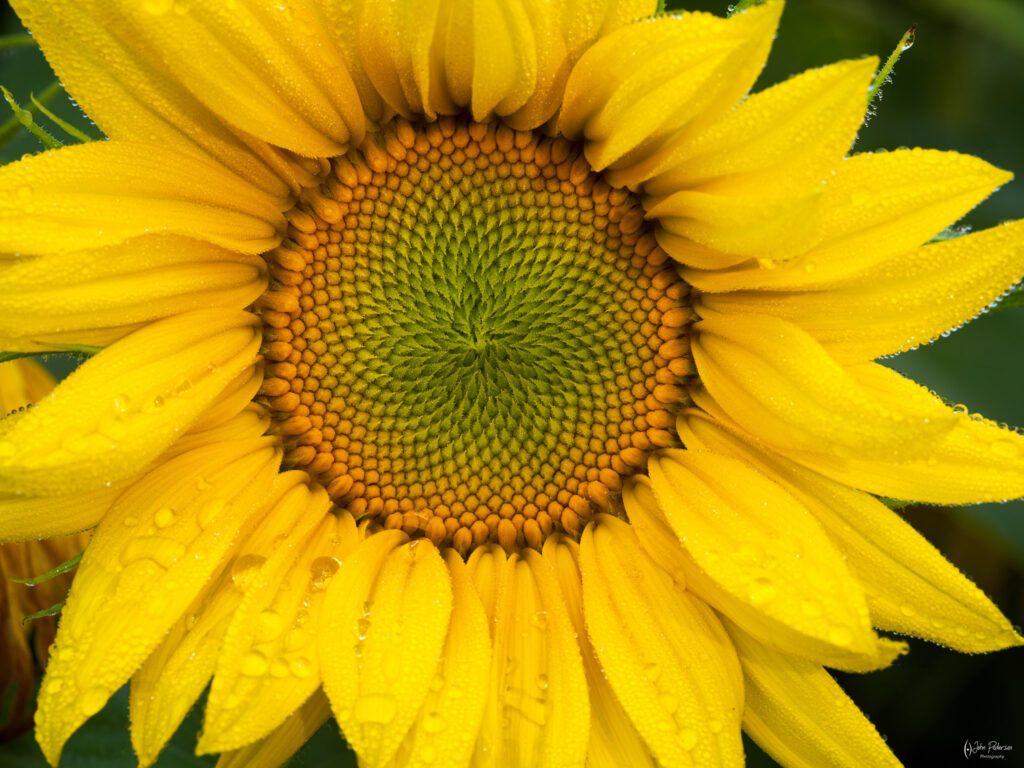
Hopefully you all know that beside aperture, the distance to your subject can also affect your perceived depth of field. When doing close-up work, I’m very close to my subject and even when shooting at f/29, I still encounter soft areas in the image. You can see in the image on the left how the point of focus is on the center of the flower and the upper leaves are soft, even at f/29!. There are a couple of strategies you can employ to overcome this. 1) Take multiple frames and focus stack a final image, either in Photoshop or Helicon Focus or 2) be OK with some areas being a bit out of focus and use that as a creative choice in your image. There is no right or wrong with how to approach it, you are the artist and it’s all up to you.
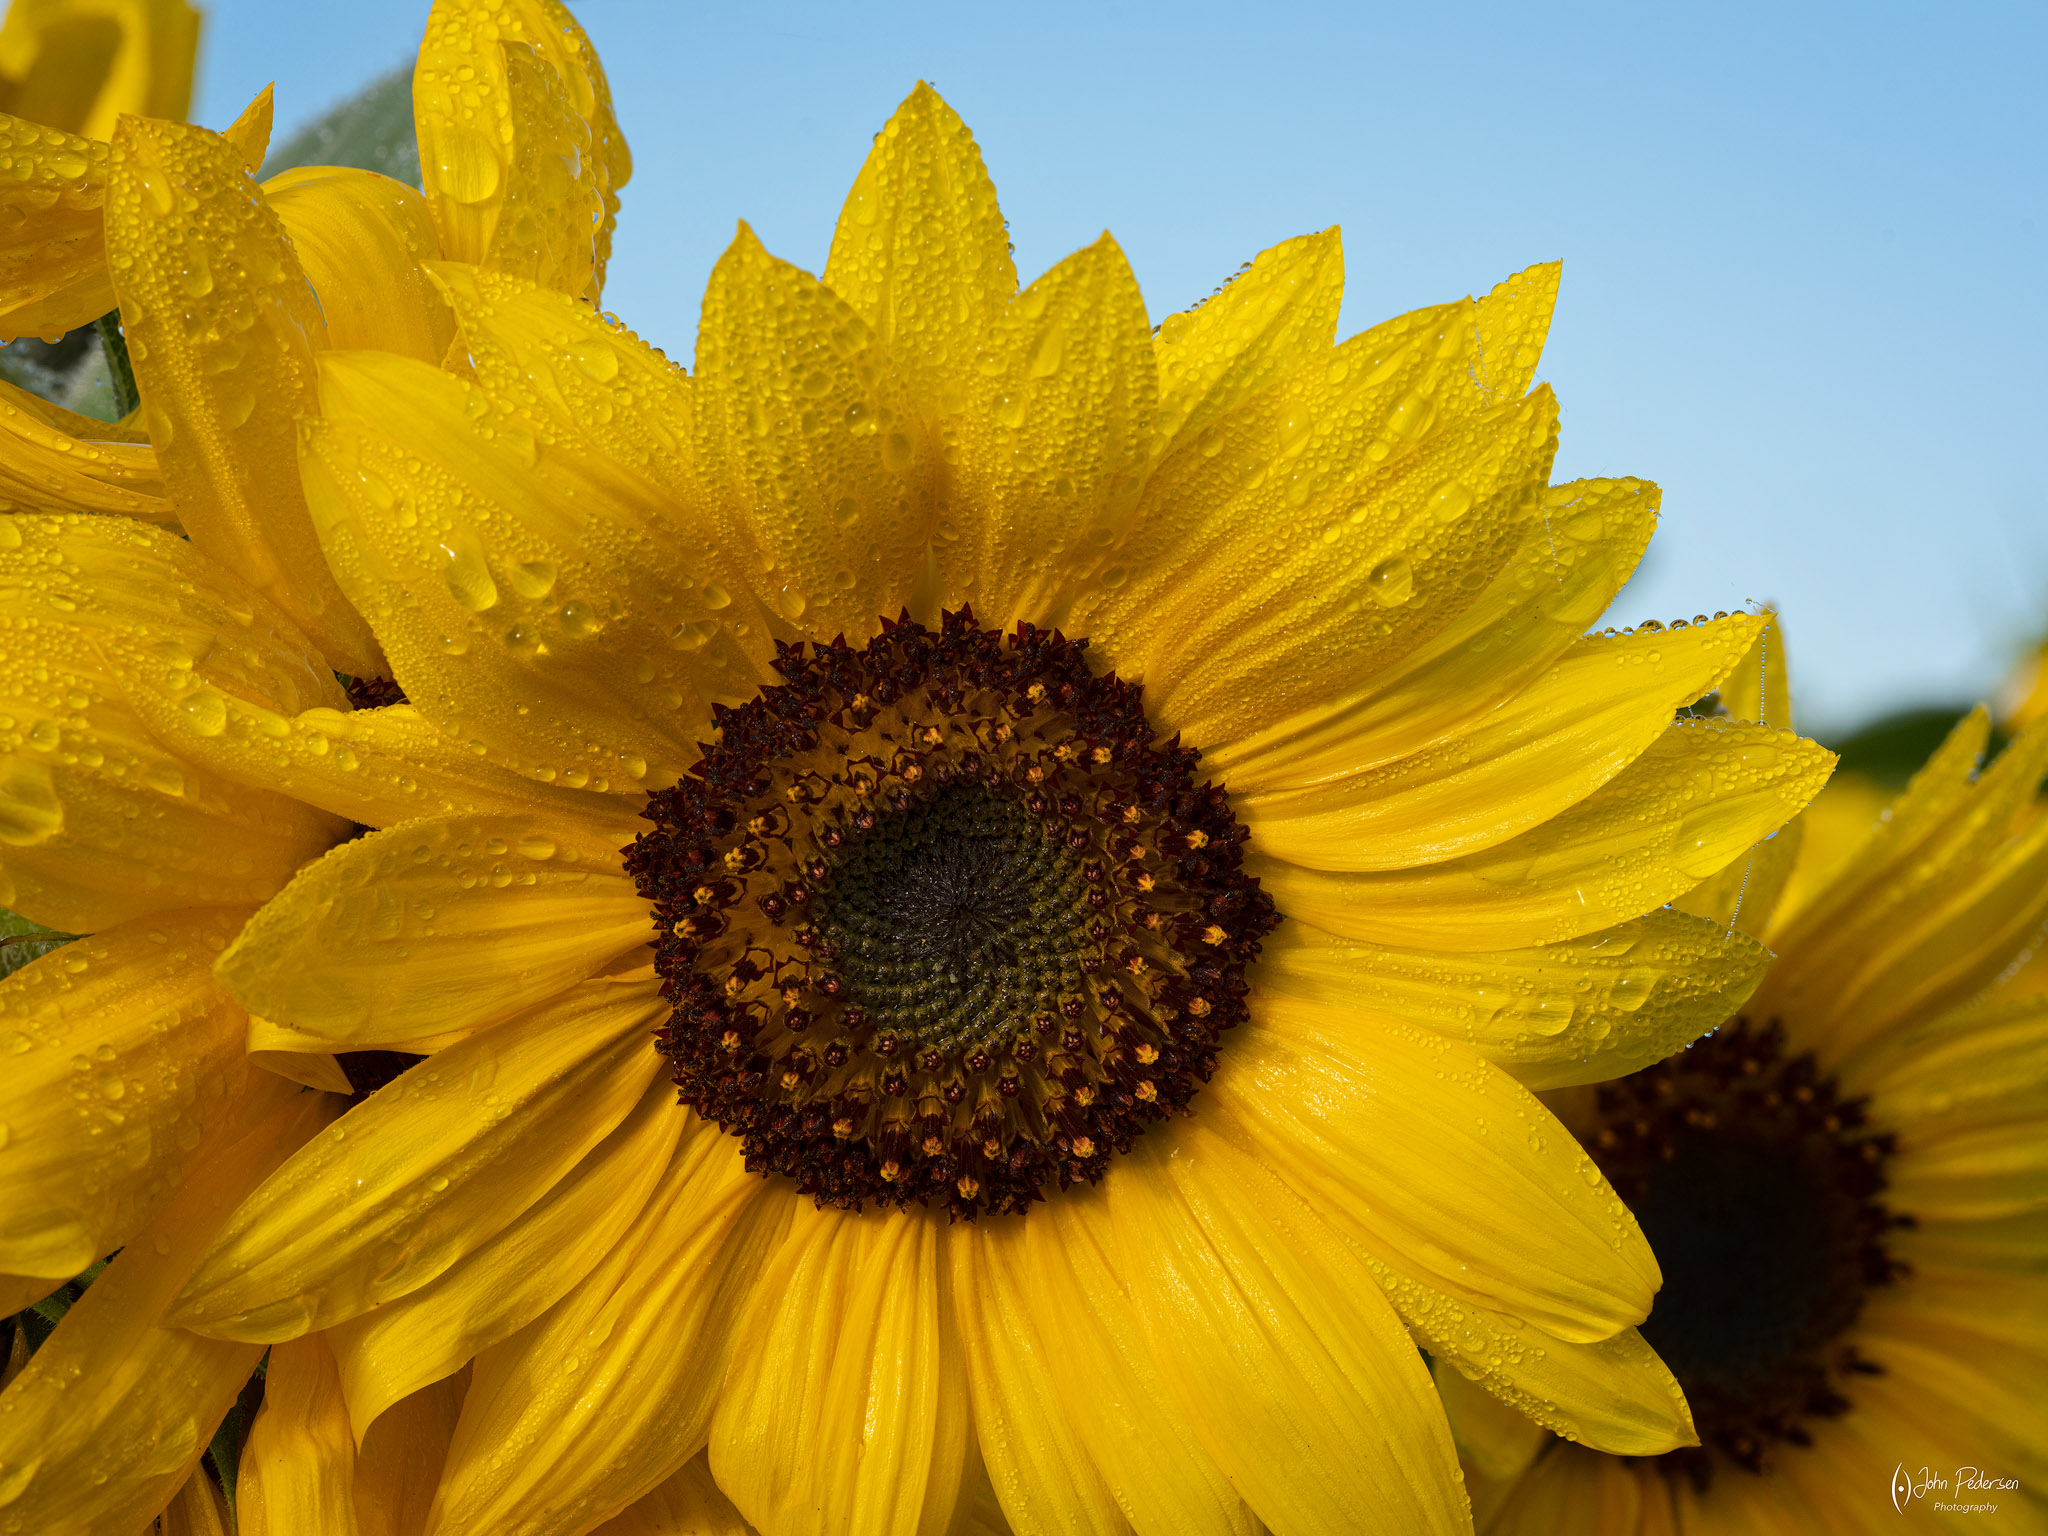
Once the fog burned off, of course the sky was now a nice blue and I made a conscious choice to shoot a few frames including the sky as an element, having a nice clear blue in contrast to the yellow of the flowers. 
By the time I took this shot, the sun was getting a bit strong and the dark centers were really dark and the leaves really bright. So in Post, I did some work to even out the exposure across the flower so there was less contrast in certain areas without removing contrast in areas where I wanted to retain it. Some folks may look critically at this and say “don’t cut off the leaves” of the flower. What I teach folks, my opinion only, is that it’s OK to cut off elements in an image, if it is intentional(!) If it is a conscious choice in the composition and it should be evident to the viewer, then it’s ok. If it is accidental or not intentional, it will come across as such to the viewer and won’t resonate with them. In the above image, because I cut off the main flower in the bottom and then the second flower on the right is cut off, plus there is a third flower on the left cut off, it shows as an intentional choice to cut off the petals and not include the whole flower.
I gotta admit, I never thought I would ever be this interested in shooting flowers! But the more I do it the more I see the endless compositional possibilities in varying conditions. It’s a lot like photographing the ocean, no two pictures are ever the same and its pretty similar when shooting flowers. They are living organisms that change day by day, plus the incredible mind-blowing variety of flowers and the shapes, textures, patterns and colors. WOW. Just look at the image below and notice the pattern in the center of the flower and that really cool green color…how cool is that? When I really get down in to the flowers, I am again humbled and amazed at the natural world and what beauty is there for us to capture.
And, what visit to a farm during Fall would be complete without photographing a pumpkin! Haha. 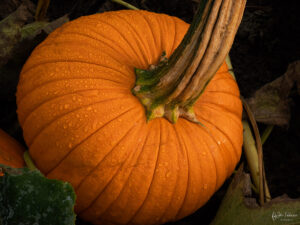 Yes, even the lowly pumpkin can be a photographic subject. The challenge is how to take a somewhat boring gourd and make it a nice photograph. This is where composition, lighting and execution take prime importance to create an interesting shot. For this shot, I walked through the pumpkin patch looking for just the right subject. What I was looking for was the quality of the pumpkin, surrounding vegetation and it’s angle to the sun and how that impacted the water drops on the pumpkin. It took me about 10 minutes of searching before I found this one and I’m quite pleased with how the finished image came out. Still shooting at f/29, I had a good sized depth of field this time because I was further from the subject. I experimented with several compositions before settling on this one. I wanted to balance the angle of the sun and how it hit the drops, showing the best “face” of the pumpkin, and most importantly having the curve of the stalk angled in just the “right” way for me. Including the surrounding foliage added “context” to the shot, showing the pumpkin in its environment and it was my choice just how much of that foliage to include. And, it was a conscious choice to cut off the bottom of the pumpkin because it wasn’t important to the shot to show the entire pumpkin. Honestly I’m not sure how many people would even notice that.
During all of this, I also found time to take a quick tour around the field with my drone, shooting some stills and video of the sunflowers and maze that was fashioned in to the field. It’s a short video (50 seconds), and includes a couple of still images you see here.
So there ya have it, my Fall Photography Tip and an example of finding opportunity to get out there and shoot, even if its not a preferred subject. Photography and the creative arts in general are something that is learned and mastered through countless hours of practice and I encourage each of you to keep pushing yourself to further your creative vision and realize it in your photographic work!
Leave A Comment