One of the highlights of late summer is photographing dahlia flowers. Typically the end of summer is a bit of a downtime for me photographically as the weather and foliage is not conducive to great photography, so, the dahlia bloom is a blast of color, shapes and textures that is a highlight of the summer. Oregon has several amazing dahlia farms who are also very welcoming to photographers. Unfortunately this year all of the festivals were cancelled, yet they still opened their fields to visitors.
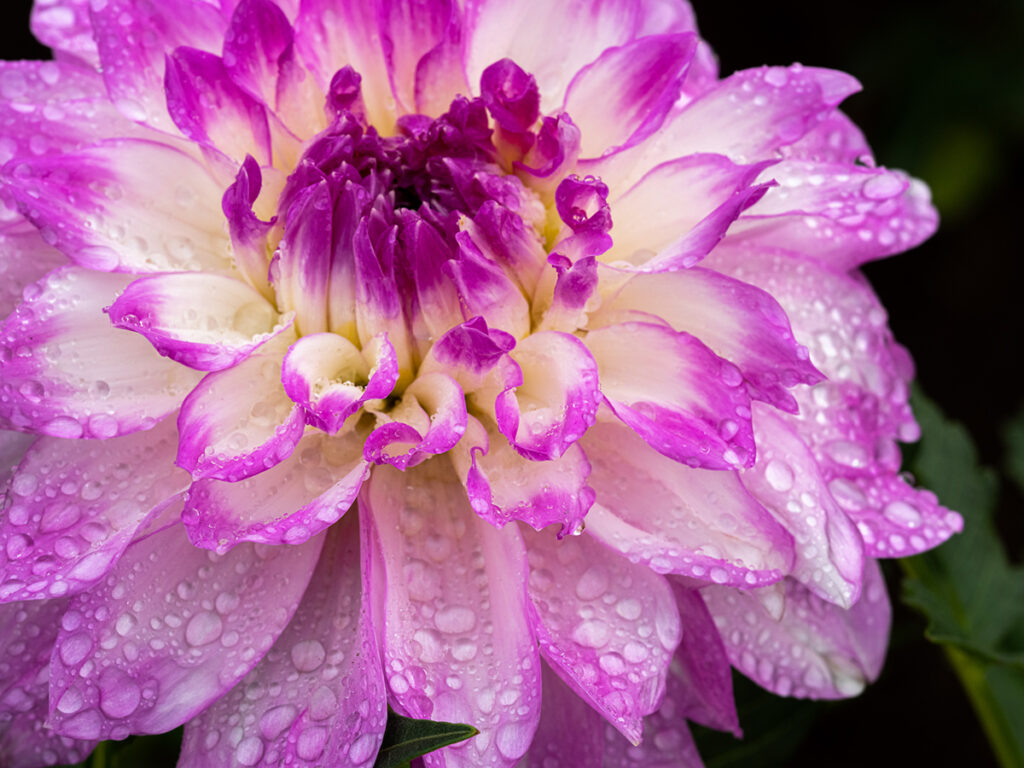
I was fortunate enough to visit one of our local fields on a great weather day and right after they ran the sprinklers in the field which produced amazing water drops on all of the flowers! If you are interested in photographing dahlia flowers, here are a few tips that you should consider. And, check out my yearly workshop during dahlia season where I can help you realize your creative vision with these amazing flowers.
Go Early
You do want the best light possible when photographing dahlia flowers, and, you don’t want to have to worry too much about all of the looney-loos, so, go as early in the day as you can. Right after sunrise is often times the best, but fields in your area might be open to the public. The goal is to get in and be able to work for a couple of hours before all of the flower aficionados descend on the fields with their iPhones and strollers. This year I arrived before the farm opened but the fields were accessible from the road so I occupied myself with the flowers alongside the road until they opened.
Environmental Conditions
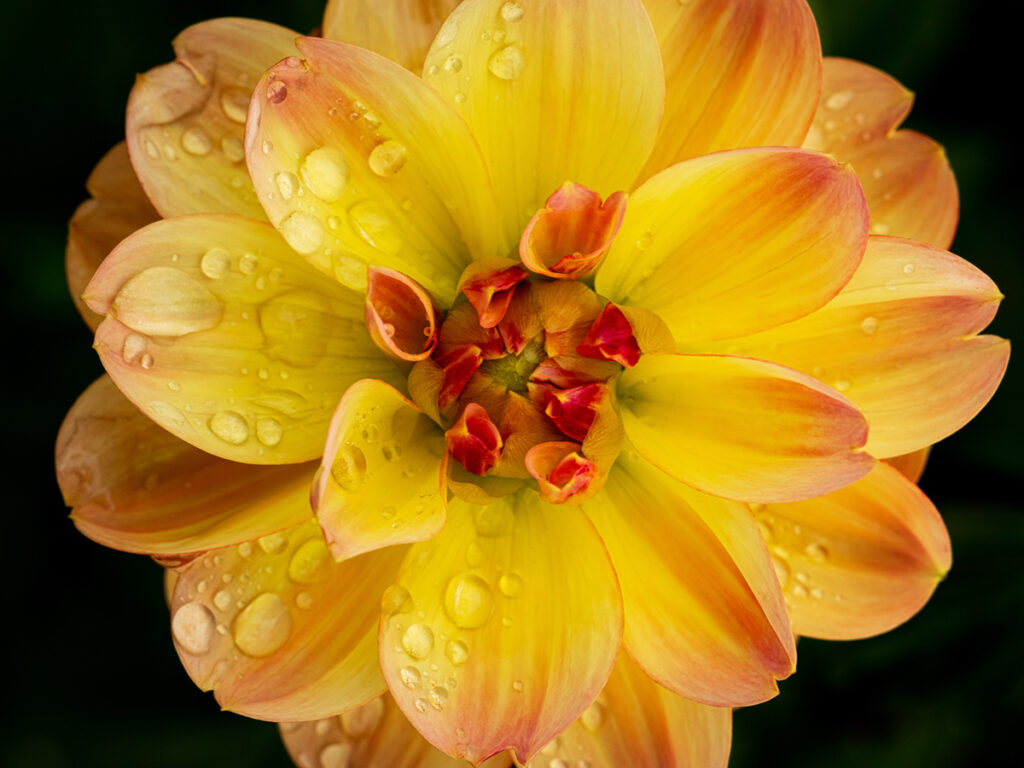
Photographing dahlia flowers, or any flower, the environmental conditions can have a HUGE impact on your photographs. When there is bright sun overhead, you will experience a high contrast scene and lots of shadows. Each flower petal will create a shadow on the one below it. Not very attractive in my opinion. It is best to time your visit to those days that are overcast, even raining. The soft diffuse lighting will even out the light across the flower and let you bring out all the detail and color of each petal on the flower. If you do happen to be there when the sun is shining, you can use a light diffuser to help block the direct light and create a more pleasing effect on the flower. I keep a small 10″ diffuser in my camera bag at all times as I never know when I might need to alter the light when I’m shooting flowers or macro shots. A collapsible diffuser will collapse (duh) into a much smaller size and are available in many different sizes. You can find these in many different sizes and shapes and they are relatively cheap.
Lens Choice
When photographing dahlia flowers, I often get asked “what lens do I use” or “can I still get good images when I don’t have a macro lens”. As to which lens, it depends 🙂 Depends on what you have as well as what kinds of shots you want to come home with. And YES, you can get great images with “normal” lenses…you don’t need a macro lens. I do most often use a macro lens when photographing dahlia flowers. I have the Fujifilm XF60mm macro for my X-T3 as well as the GF120mm macro for my GFX. I find that these lenses are incredibly sharp and have a great focusing distance and work great for the types of photographs I want to create.
One of the biggest factors you need to consider when selecting a lens is the lens’ minimum focusing distance. With many lenses you can’t get too close to the subject and still be able to achieve sharp focus, sometimes 12-24″ minimum. If you want to fill the frame with the flower, this minimum focusing distance may not be enough. The longer lens you use the further away from the subject you need to be. On a 100-400mm which would really zoom in on a flower, you need to be at least 3M away from the flower. At this distance you won’t be able to move around the flower and get the right composition as you’ll be limited by the field, paths, people, etc. Macro lenses on the other hand are designed to have closer focusing distances so you can be right on top of the flower and really fill the frame. Many macro lenses can only go to a 1:1 magnification, which means it will be life sized in the frame. If you want to get even closer, you may need to buy a lens designed for higher magnification.
One less expensive option that can decrease your focusing distance and make a “normal” lens act more like a macro lens is using extension tubes. These are hollow parts that fit between the camera and lens, moving the lens elements further away from the camera sensor, thereby increasing the magnification.
Depth of Field
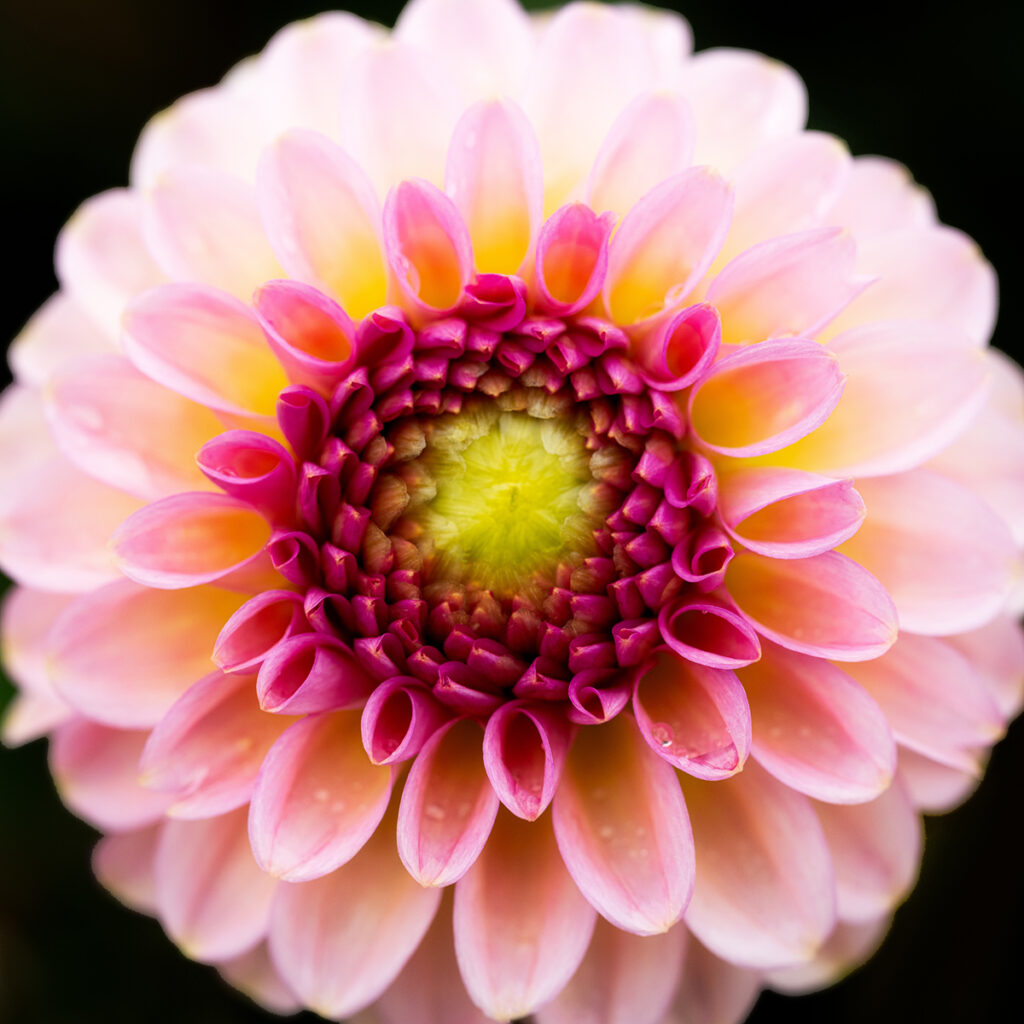
If you are using a macro lens while photographing dahlia flowers, you need to focus on the depth of field to make sure that you get all of the flower that you want in focus, in focus. When working very close to your subject, the depth of field is typically shallower at a given aperture. If you typically shoot at f/8-f/11 when doing landscapes or other types of photography, you will find that when doing macro or close up work that f/8 is really shallow and you might not get all of the flower in focus. Hopefully you have a Depth of Field preview button or focus peaking highlights in your camera so you can see which parts of the image will be in focus and can make adjustments before you take the shot. I often work at f/16-f/22 on my X-T3 and then work around f/29 on my GFX when I want all of the flower in focus.
Remember that you do NOT need to have all of the flower in focus if you don’t want to. In some shots I do enjoy having the focus fall off towards the sides and back of the flower to give a more “dreamy” look to the flower and/or to focus the viewers attention to the area that I really want them to look. Remember, focus or out of focus will help direct the viewers eyes and its a subtle tool that artists can use in their work.
Check Your Background
Another thing to think about when you are photographing dahlia flowers is the background behind the flower. Too often we are fixated on the flower and getting just the right composition. Then, when we get home and review our images, we see unsightly stems, stalks, flowers or bright spots in the background which detracts from the beauty of the flower. As you are working in the field and lining up that perfect shot of a flower, pause and scan the background through the viewfinder to see if there are any distracting elements behind the flower.
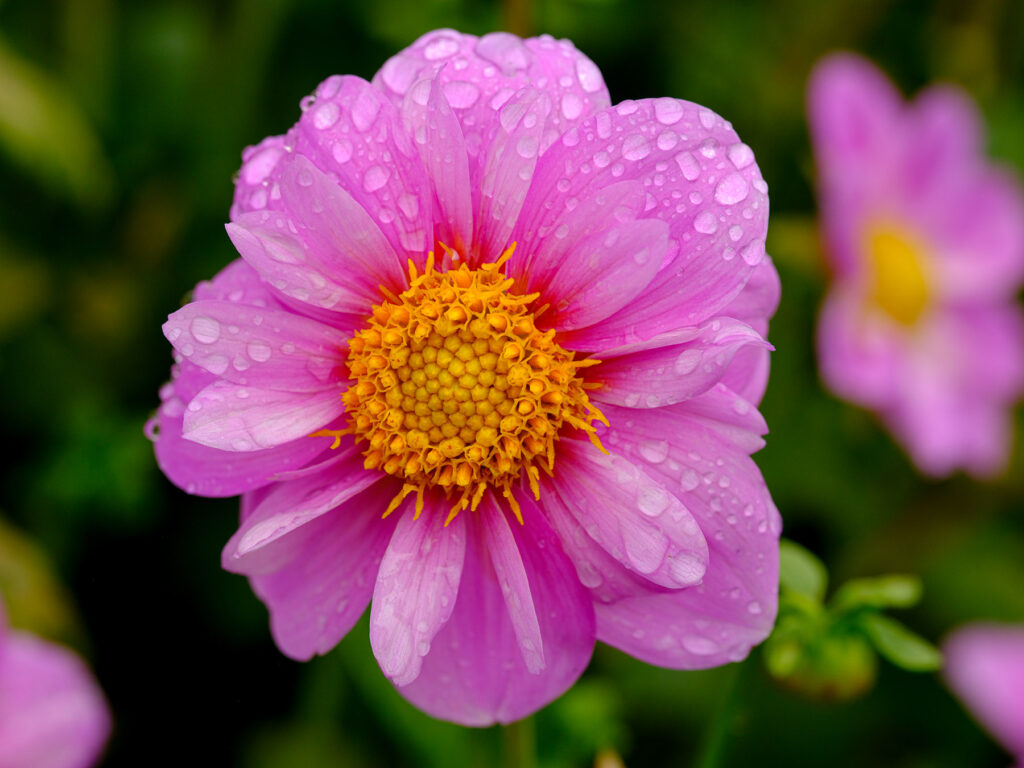
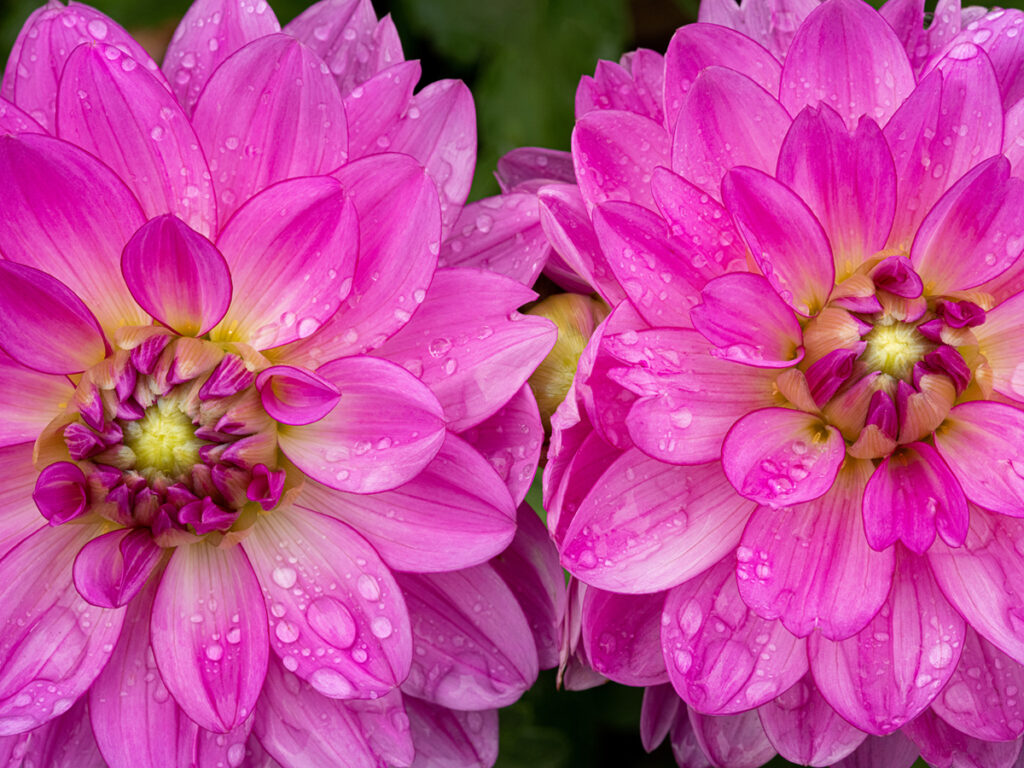
In this shot, I wanted to highlight this one flower as I liked the colors and textures and the water drops. I was fixated on the flower and didn’t pay attention to the background. As you can see, there are bright pink flowers in the background, partial flowers and stems and buds, which all detract from what I wanted to do, which was to isolate and focus on that one flower. Once I took the pictures, I paused and scanned the background and saw all the “noise” behind and around the flower and reshot the same flower with this result…
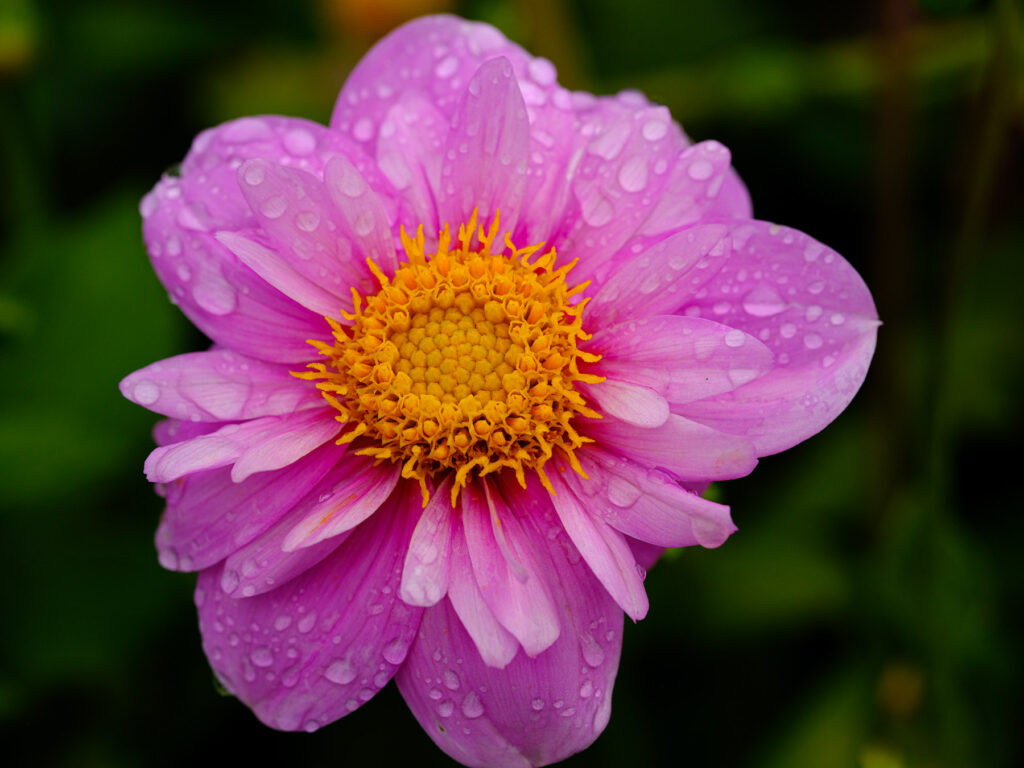
Notice that without all of the distractions behind the flower the eye is directed right on the flower and there is nothing to pull the eye away from what I want the center of attention to be. How did I do this you might ask? Simply by moving my tripod a very small amount I was able to better isolate the flower. Plus in post I did a small amount of cropping to remove some elements I couldn’t do in my original composition. You may want shots showing multiple flowers to help give a sense of scale or depth to the image and that’s great! You’re the artist and you can shoot it how you want. Just be very aware of what’s in your frame and the “acceptable” amounts of focus in the frame.
Variety of shots
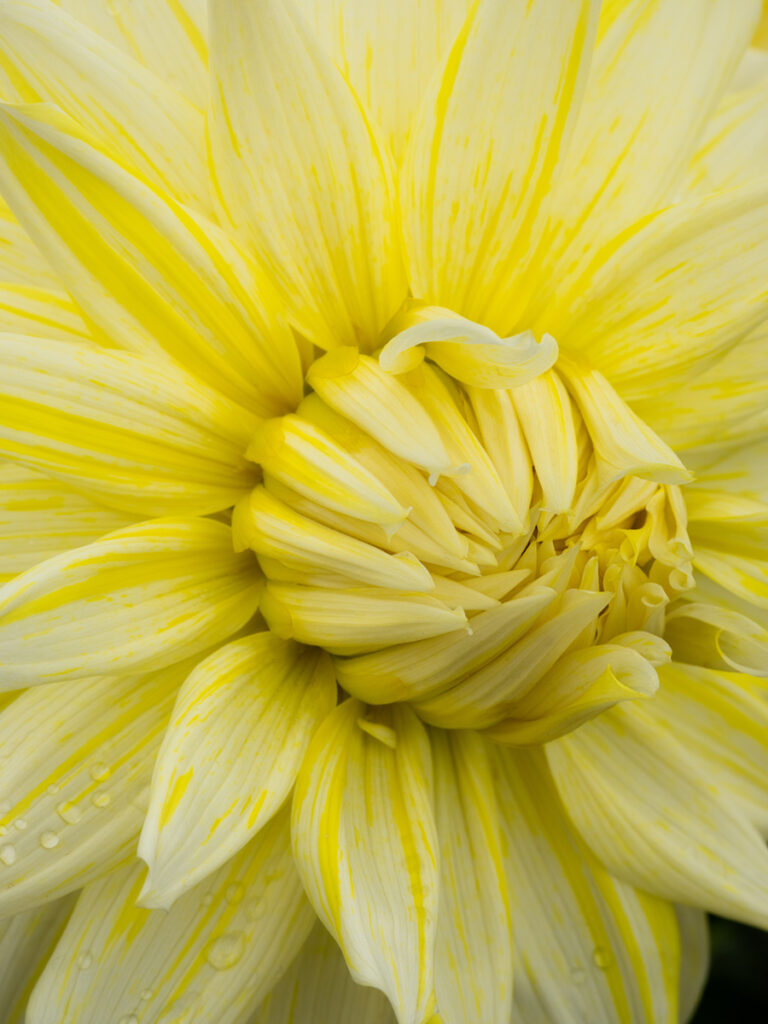
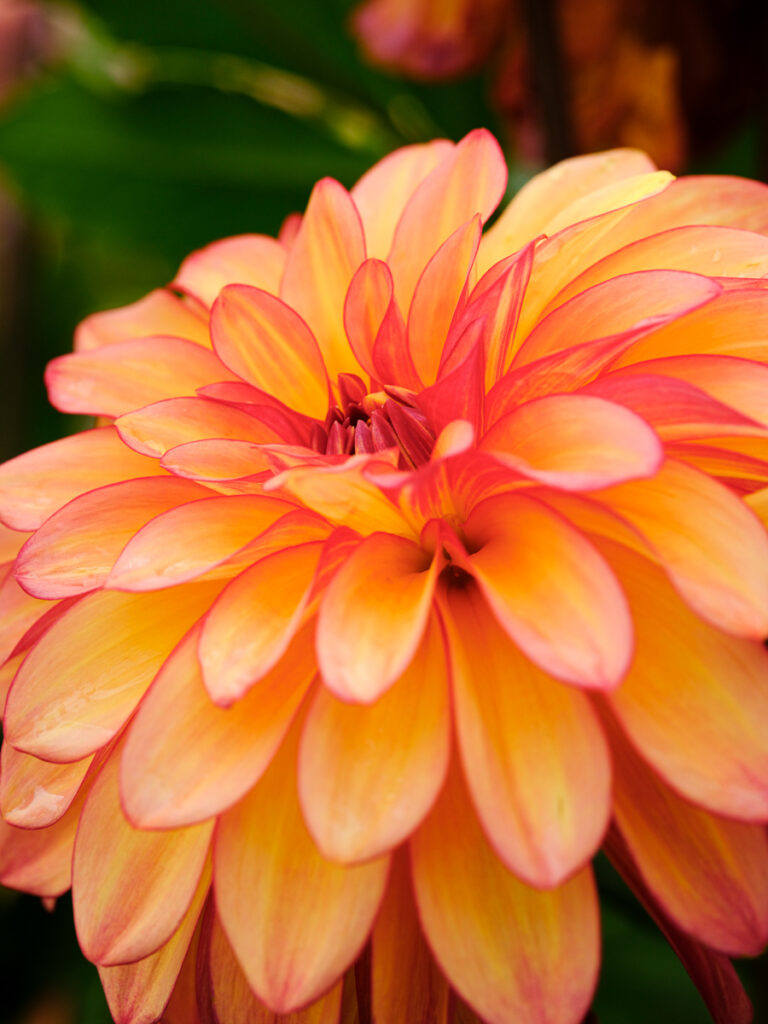
The cool thing about photographing dahlia flowers is that you can shoot them from so many different angles. Don’t be afraid to experiment with different angles and perspectives, and at different apertures to achieve different creative effects.
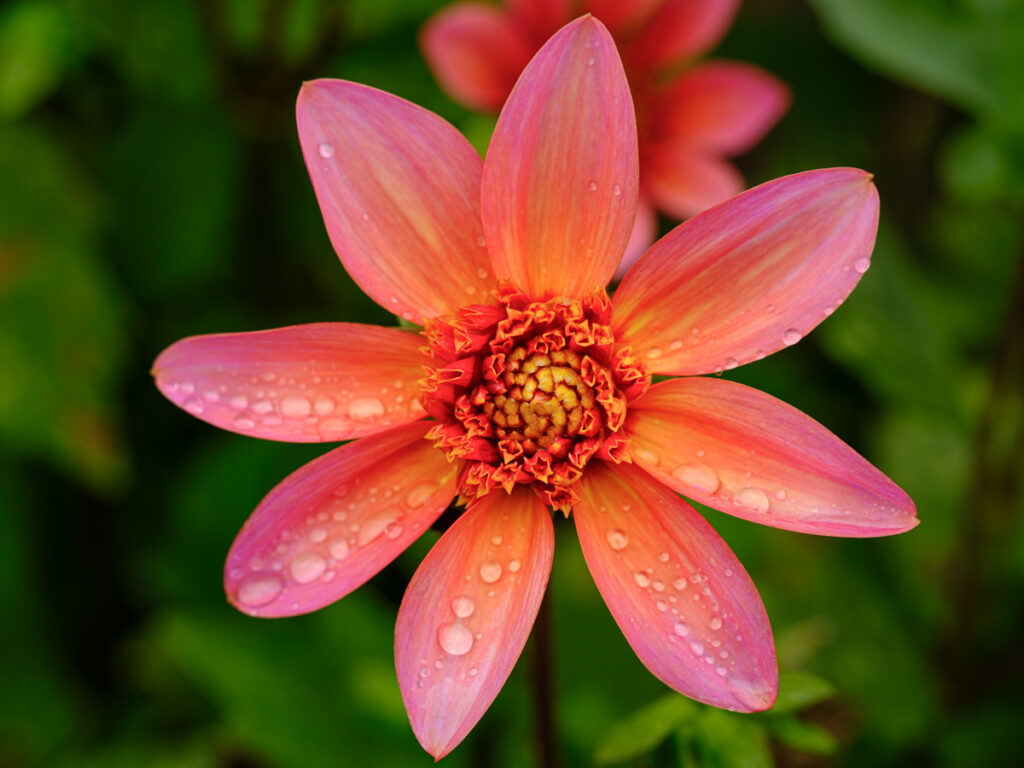
You can include the whole flower in your shot
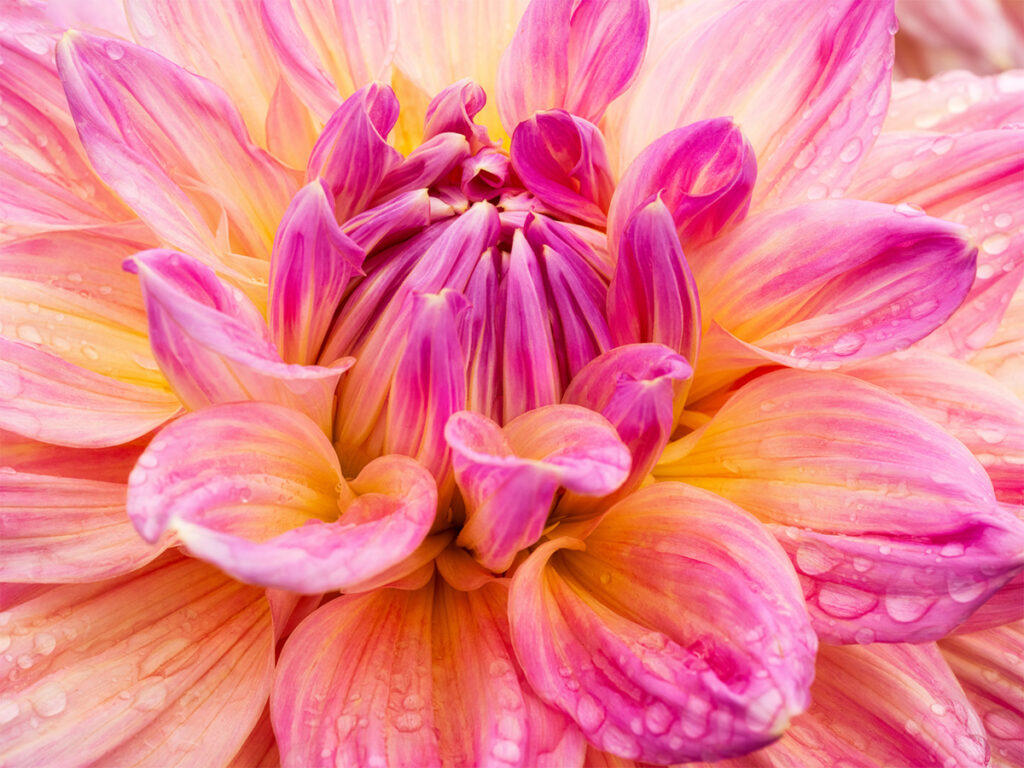
You can include just a small portion of the flower
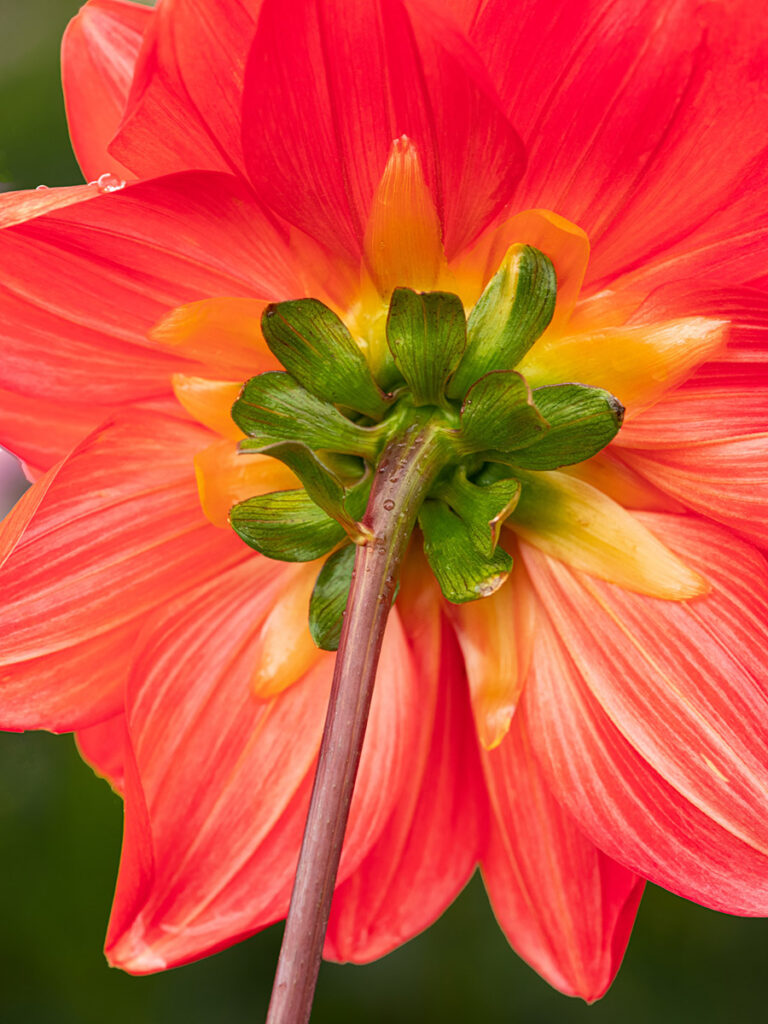
You can even make great shots shooting the back of the flower!
Water Drops and Foliage
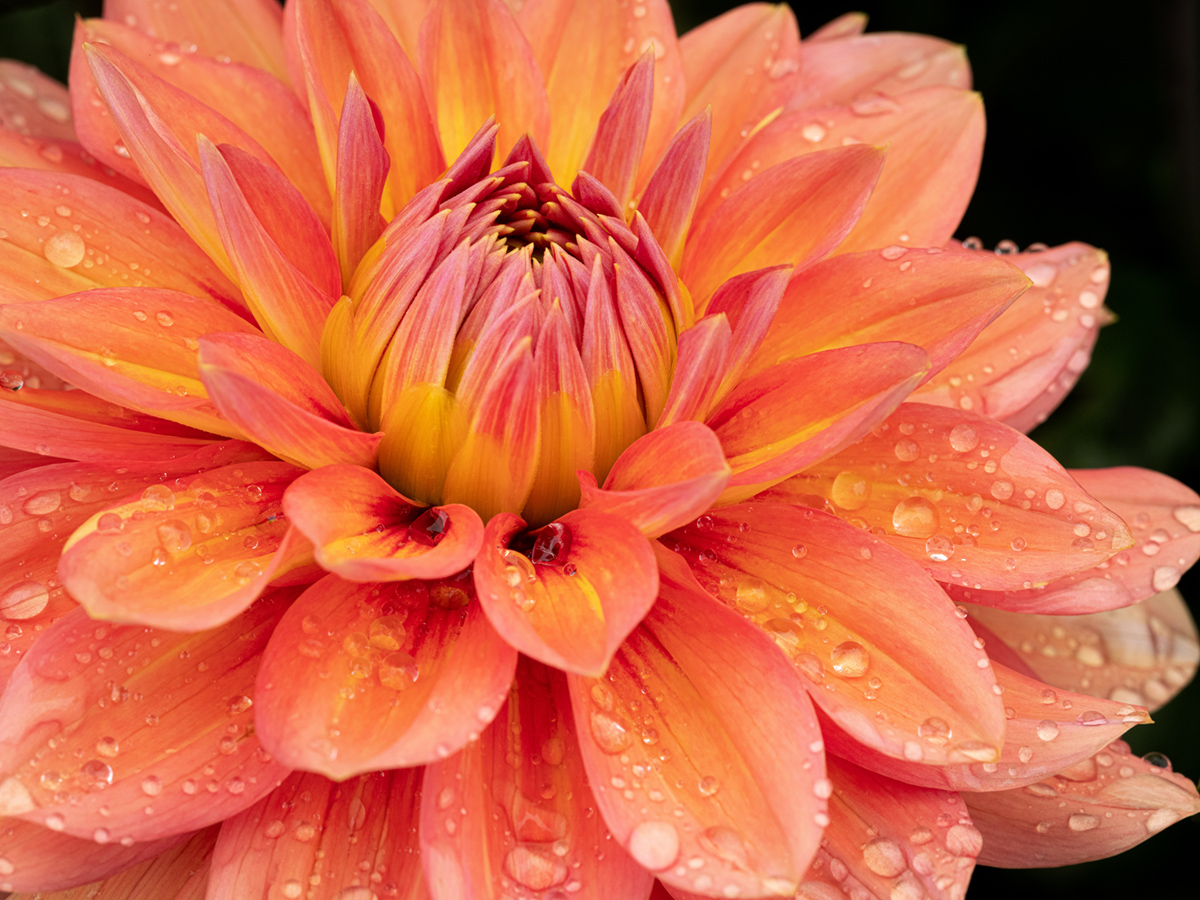
In my opinion, having water drops on the flowers adds a bit of extra visual interest to the image so when drops are present, I work to include them as much as I can in the photographs. Because we humans are very perceptive to in-focus and out-of-focus elements in an image, the water drops add a bit more complexity to an image as I want to keep all the drops as sharp as possible on most of the petals, even when my focus point is in the middle of the flower. My range of “acceptable sharpness” gets more critical and I need to typically increase my aperture to have more of the flower in focus, so that more of the drops are in focus.
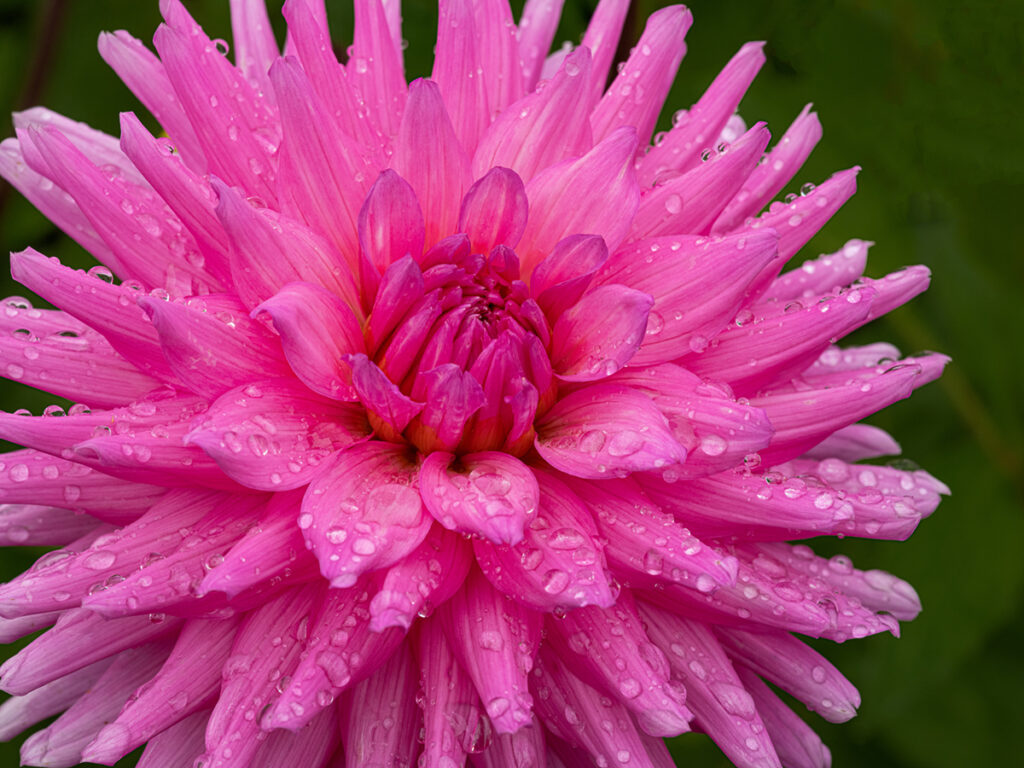
And don’t be shy about including greenery or foliage in your flower shots. Sometimes the leaves and buds can add some additional depth and visual interest to the shots. When I do choose to include them, I find examples where the leaves don’t hide or detract from the main element of my image, instead they highlight and/or direct the eye towards the main area of subject in the image.
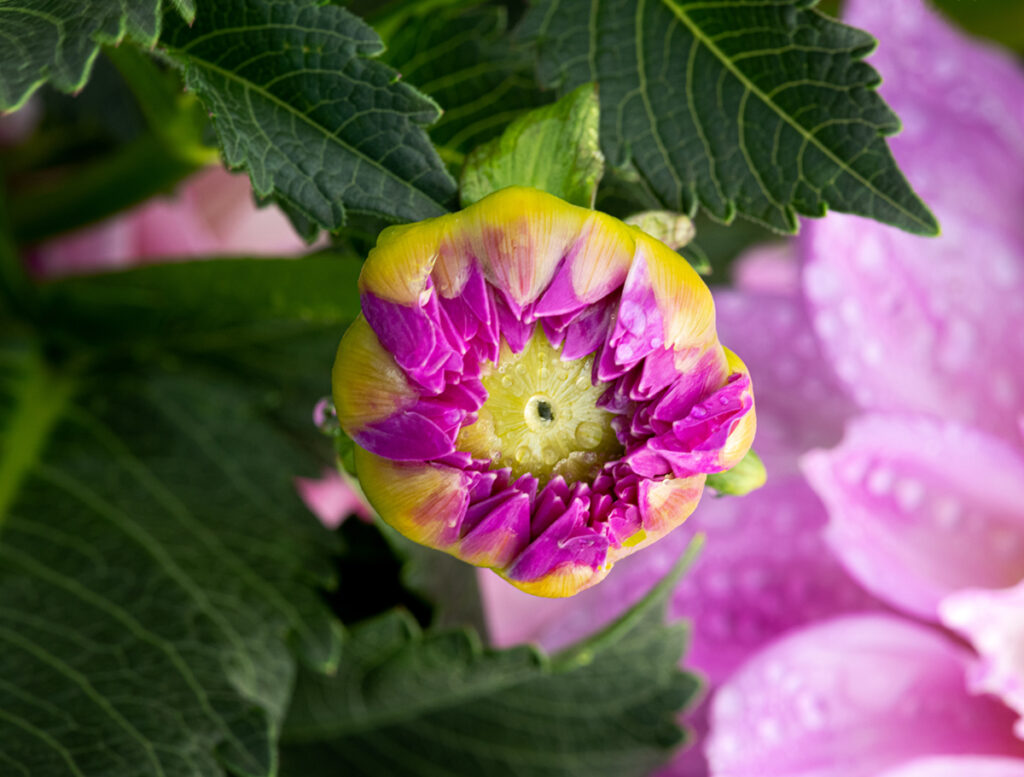
Framing
One last tip for photographing dahlia flowers, if you choose to not include the whole flower, be very deliberate about where and how the petals leave the edge of the frame. When you “cut off” leaves, make sure that it is consistent as possible on all sides of the frame. If you have petals leaving the frame on only one side, it may look like you just didn’t take a good photography. However, if you have the petals leaving the frame on 3 or 4 sides of the photograph, then it looks deliberate and crafted.
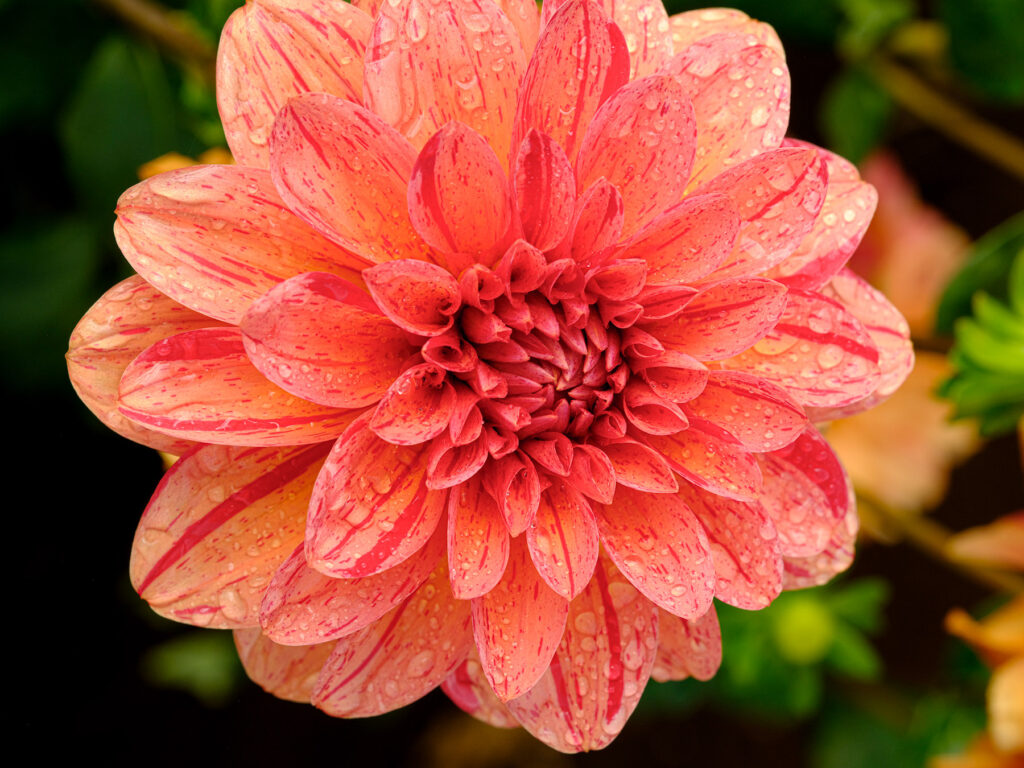
In the above example (which I shot on purpose for this article) you can see how the petals are leaving the frame on the top side. This gives the feeling that I just wasn’t paying attention and didn’t capture the whole flower since that is what it seems I was trying to do.
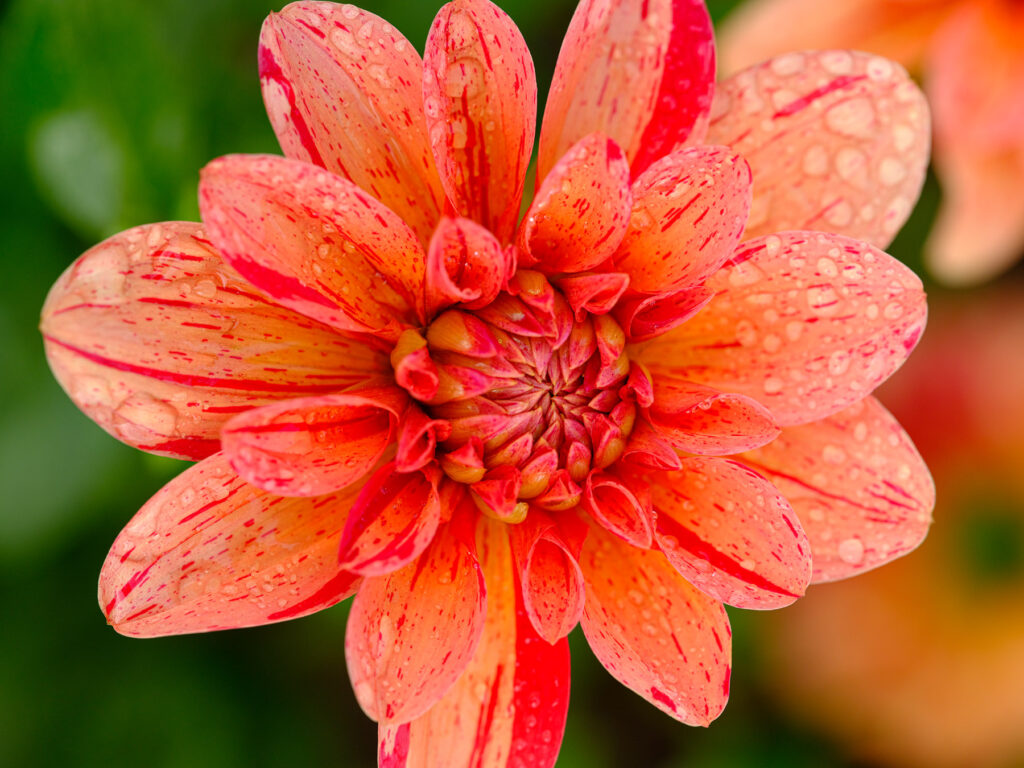
In this example the petals are leaving the frame on the top and bottom of the frame. This gives the feeling of being deliberate and designed, not sloppy. If I had zoomed in closer petals would be leaving the frame on all 4 sides. There is no “rule” to this, just be very clear to your viewer what you are intending to do.
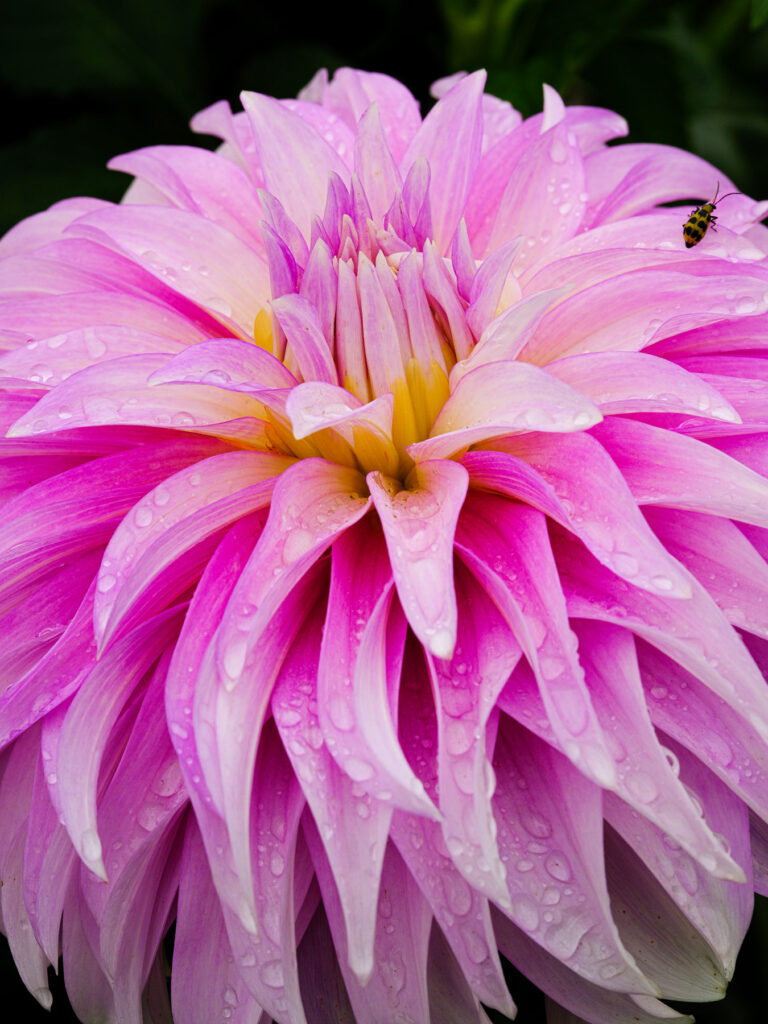
And in this final example, I oriented my tripod and camera to have petals leaving the frame on 3 sides of the image, leaving the top open so the image would “breathe” a little bit. AND, I also pay special attention to WHICH leaves are included and which are cut off and where they are cut off. Oftentimes its very small adjustments with the tripod to get this framed just right. The leaves that are fully included….I also left enough “space” between the end of the petal and the edge of the frame, not wanting to crowd the end too much. Also, notice too how the shape of this flower, long drooping petals, really works best in a portrait orientation, not in a landscape orientation. Read the shape of the flower and decide which orientation would look best for the flower.
If you want to see a short video of my most recent trip to the dahlia fields and how I captured some of these images, check it out here: My Video
So there ya go, some quick tips for photographing dahlia flowers. If you have any questions or want more information don’t hesitate to drop me a note or leave a comment below.

Leave A Comment