Let me ask you, when you are composing your shot, is the orientation of the camera a consideration in the composition? Often we look at angles and light and positioning of the subject as conscious choices in framing up our comp, but how many times do you actively consider or contemplate the orientation of the camera and which way would be best for the photograph and the story you are trying to tell. The orientation of the camera can have a profound impact on the image and I’m here to remind you to consider this as an important part of the composition, as important as framing, subjects and light. Let me give you some reasons why…
Compliment what you’re shooting
First and foremost, the orientation should be complimentary to the subject, compositional elements, story or what you are  trying to achieve artistically. The most obvious and easily understood example is photographing trees. Trees are a vertical subject and photographs typically respond well when the orientation of the camera is the vertical, or portrait, position. By orienting the camera vertically, we can include more of the subject, and, the shape of the frame (vertical) mimics the shape of the subject. In this image on the right, the trees are the main subject and what I really wanted to highlight, so I put my camera in portrait orientation and composed the shot.
  Another example is the lone tree reflected in the water. Again, a vertical subject and vertical reflection lent itself well to a vertical orientation of the camera.
There are times when I am photographing trees and I may want to tell a slightly different story.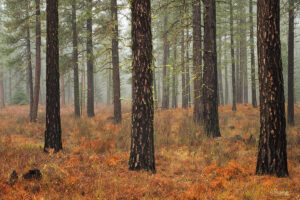 In this shot to the right, the main subject is the trees of course, however the fog was a very big element for me in a shot like this. I wanted to de-accentuate the trees to a point which would bring up the importance of the fog, so I chose to shoot this in a landscape orientation. Now the story isn’t just about the trees in the foreground, it’s about a fog shrouded forest. A very different story than an image about trees.
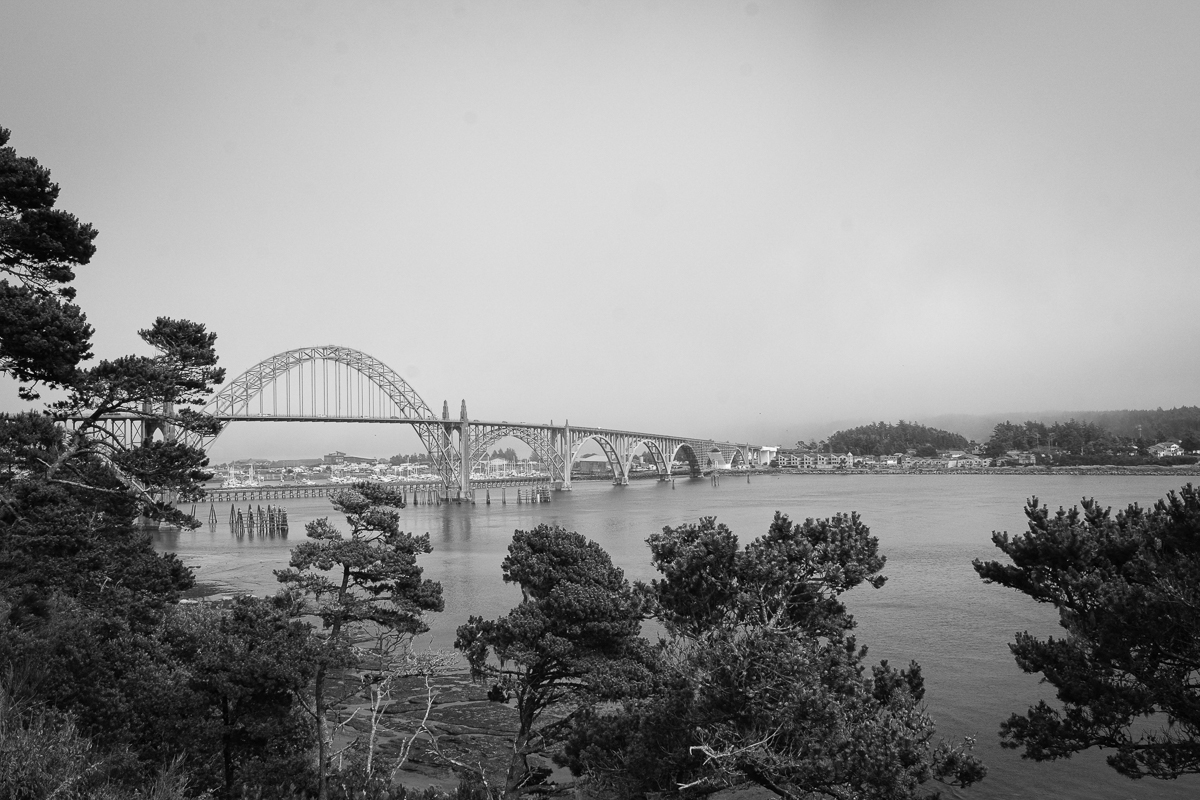
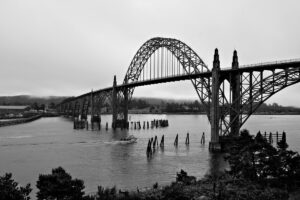 This image of the Yaquina Bay Bridge in Newport Oregon is a great example of a horizontal subject. I wanted to fill the frame as much as possible with the bridge, and I wanted the orientation of the composition to compliment the subject, so I put my camera horizontal to compose this image.
When you find a subject or a scene that you want to photograph, take a moment to evaluate it and decide on what would be the best orientation for the camera. A more creative example of a conscious choice is in the shot below…I was drawn to the dividing line between the rocks and the wood, plus the different textures and colors between reds and blues. That dividing line was a huge factor in me wanting to shoot this image, so I wanted to accentuate it as much as possible. Since I knew that the dividing line was horizontal, I made a conscious choice to have the orientation of the camera horizontal as well in order to include as much of that line as possible in the image.

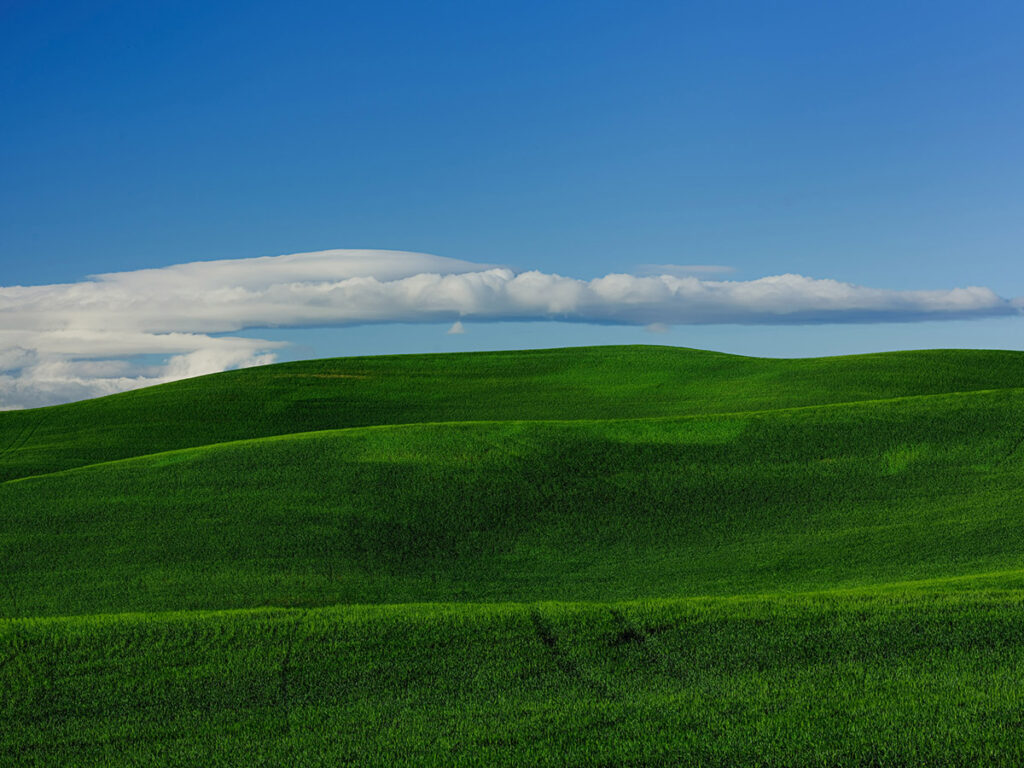
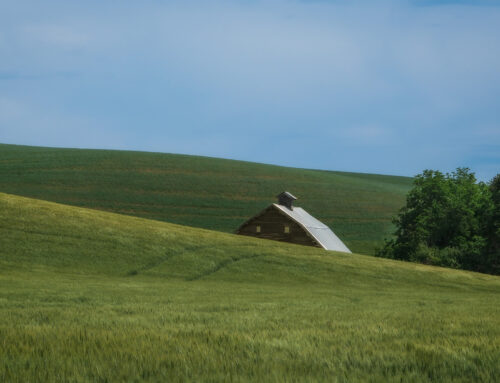
A similar evaluation took place when I created this image below from the Palouse. The clouds in the sky are in a horizontal line and the folds and rolls in the hills are horizontal. I wanted to accentuate and compliment the design elements in the landscape in front of me, so the orientation of the camera was in landscape, or horizontal.
Create a Sense of Depth
Orientation can create a sense of depth in an image, as well as height.  In this image, I of course wanted to include the driftwood, the ocean and a good amount of sky. If I would have shot this in the landscape orientation, I could have achieved most of what I wanted. However, my moving my camera to a vertical position, I created a bit of perceived depth in the image and didn’t have to cram the driftwood tight in the foreground. Shooting in landscape orientation can sometimes “flatten” the perceived depth in an image, and for sure restricts the height. Shooting vertically tends to elongate the scene, thereby creating more perceived depth in an image.
Shoot Both Ways
When in doubt, shoot a scene in both landscape and portrait orientation. Back in the day, that used to be standard practice as calendars always wanted landscape orientation and magazines always wanted vertical orientation. Today though, especially on social media, it doesn’t matter as much.
Some scenes can be photographed successfully both ways. Granted, the resulting “story” or “feeling” you may get will be different between the two orientations.
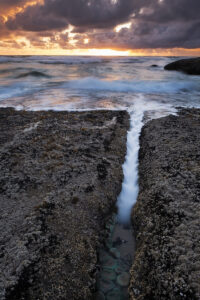 The first example of this was shot along the Oregon Coast. This is a location I visit often and one that never fails to produce some great shots when the tides are good. In this first shot, I really wanted to emphasize the crack in the rock filled with sea foam. To accentuate the length, and to have it act as a leading line towards the back of the image, I made the conscious choice to shoot vertically. It complements the subject (crack), adds a sense of depth and leads the viewer to the back of the image.
Even though I knew that vertical was the right orientation for this shot,  I chose to experiment a bit and shoot it in landscape mode, showing more of the shelf of rock and another water channel to the left. Can you feel the shift in emphasis and story in the image? Two very different stories from the same location at the same time, simply by changing the orientation of the camera.
For another example, here are two shots from Balstad Norway during my winter workshop there before Covid. It was a beautiful morning as the sun began to paint some color on the mountains behind the harbor and there was no wind which meant glass-smooth water. 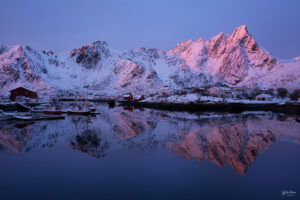 Mountains are typically shot horizontally to show the breadth and size of the mountains, so my first choice was to shoot them horizontally.
Once I had gotten the horizontal shots out of the way, 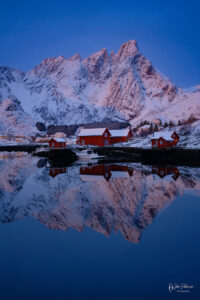 I started looking and thinking a bit more creatively and made the choice to shoot a few vertical compositions. You can see how it changes the scene. I no longer have the immense breadth of the mountains, but I do have a more intimate scene of a portion of the mountains and the red houses. Both shots are fine, its a matter of personal preference, what you want to show, and what story you want to tell.
Easy Button
On my workshops, I encourage folks to switch the orientation of the camera while on location. It’s a great way to show folks how their vision might change as well as different compositional possibilities. One thing though that I repeatedly see is for most, switching the orientation of the camera is a chore, a challenge and a general pain in the butt, so they don’t want to do it. These folks typically have a plate screwed on to the bottom of their camera that fits in the ballhead. Because it’s on the bottom, the camera is naturally in horizontal (landscape) orientation. Switching to a vertical comp means that they have to flip their camera down using the slot in their ballhead and then recompose the shot. Lots of fumbling and adjustments and some cursing typically happens during this effort. :-)
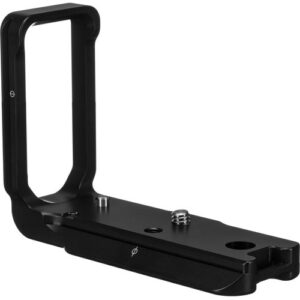 Let me give you my biggest recommendation for a camera accessory. An L Plate! I put an L Plate on each new camera I get the minute I get it. I started shooting with this style of plate many years ago and I will never, ever, go without. If you don’t know what an L Plate is, essentially it has a plate along the bottom of the camera connected to a plate running up one side of the camera. Both of these are typically area-swiss compatible, meaning it will fit most tripods.
If you are using an L Plate, all you need to do to change the orientation of the camera is to open the ballhead clamp, pick up your camera and rotate it 90 degrees and put it back in the ballhead clamp. You don’t need to adjust the ballhead or move the tripod again. The exact same positioning that you had for one orientation is the same when you switch your camera. No need to move the tripod over or adjust height, etc. It takes 10 seconds to flip from horizontal to vertical, or vice versa.
You can buy L Plates that are custom designed for your camera body, from companies such as Really Right Stuff or Kirk. These custom engineered plates are fantastic and really fit the camera well, typically allowing for access to all the doors and compartments on your camera without taking the bracket off. But that comes at a premium price, typically well over $100. If you are more budget minded, or aren’t sure you want to commit to an L-Plate, you can buy generic ones from Amazon or eBay that will fit almost any camera and do the job. There is a chance that some access may be limited depending on the camera body, as with my GFX camera, but it’s a small inconvenience for me at this point.
If you’ve made it this far, thank you!!!! I hope that I have inspired you to think about the orientation of the camera when you are out shooting next. If you’d like to see more examples of this and hear me talk more in-depth about this topic, check out my latest YouTube video below.


Leave A Comment